# How to Build Your First Lottie Creator Plugin: Create and Animate a Rectangle
*By Amir J · September 15, 2026*
Creating a beginner-friendly Lottie Creator plugin using the Creator plugin API.
---
In this tutorial, we’ll build a simple plugin for **Lottie Creator** that creates a red rectangle in the center of the scene and animates it horizontally.
This is a beginner-friendly example designed to introduce the core architecture behind Creator plugins:
- Building a simple plugin UI
- Sending messages from the UI to the plugin
- Accessing the active Creator scene
- Creating a shape layer
- Adding a rectangle and fill
- Positioning the rectangle
- Adding animation keyframes
By the end, you’ll have a working plugin that creates an animated rectangle directly inside Lottie Creator.
[Embedded content](https://www.youtube.com/embed/WakymVxPK4A?feature=oembed)
* * *
## 1\. Open the Creator Plugin Catalog
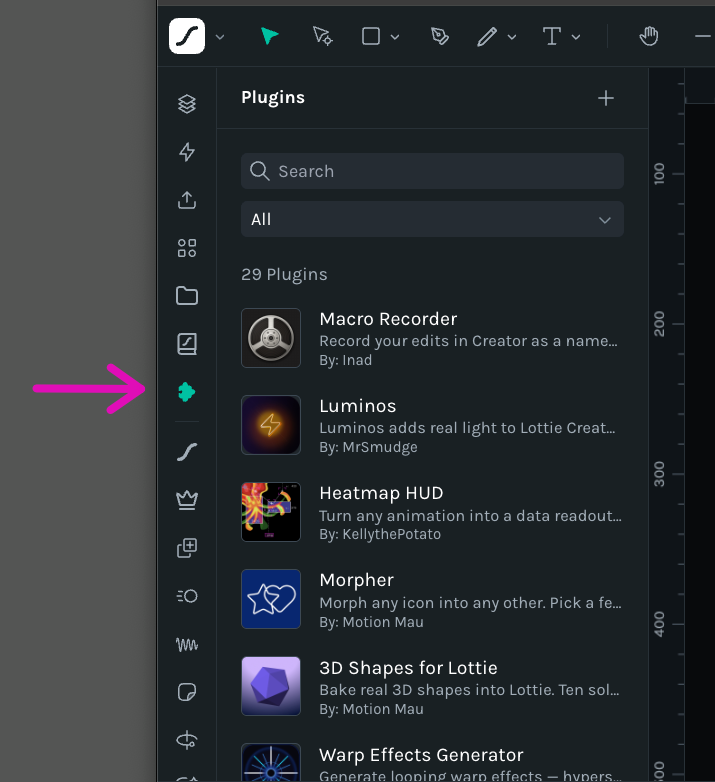
Inside **Lottie Creator**, open the Plugins catalog from the sidebar.
The catalog contains a growing collection of plugins that extend Creator with additional tools and workflows.
Some tools that may already feel like native Creator features were originally built using the plugin system.
* * *
## 2\. Create a New Plugin Project
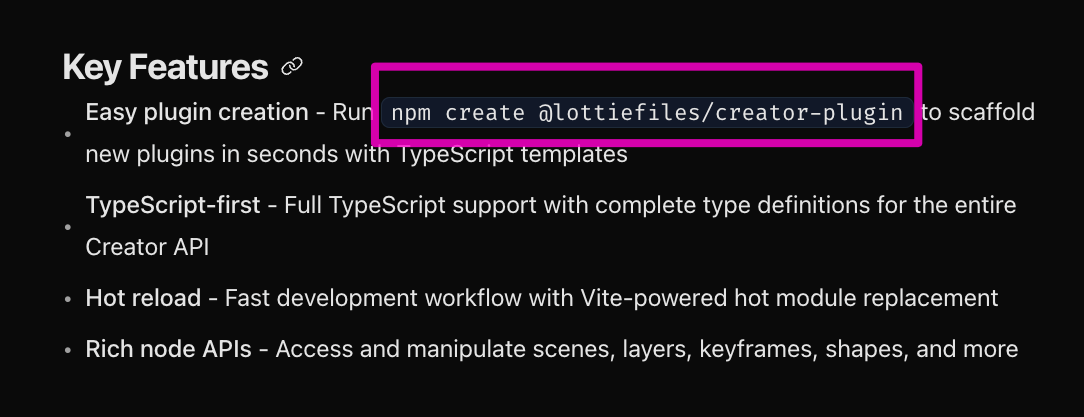
Go to the **LottieFiles Extensions**, where you’ll find the Creator plugin documentation and development resources.
For this tutorial, we only need the plugin creation command:
```bash
npm create @lottiefiles/creator-plugin
```
Copy the command.
Create a folder on your computer for the project. For example:
```
my-plugin
```
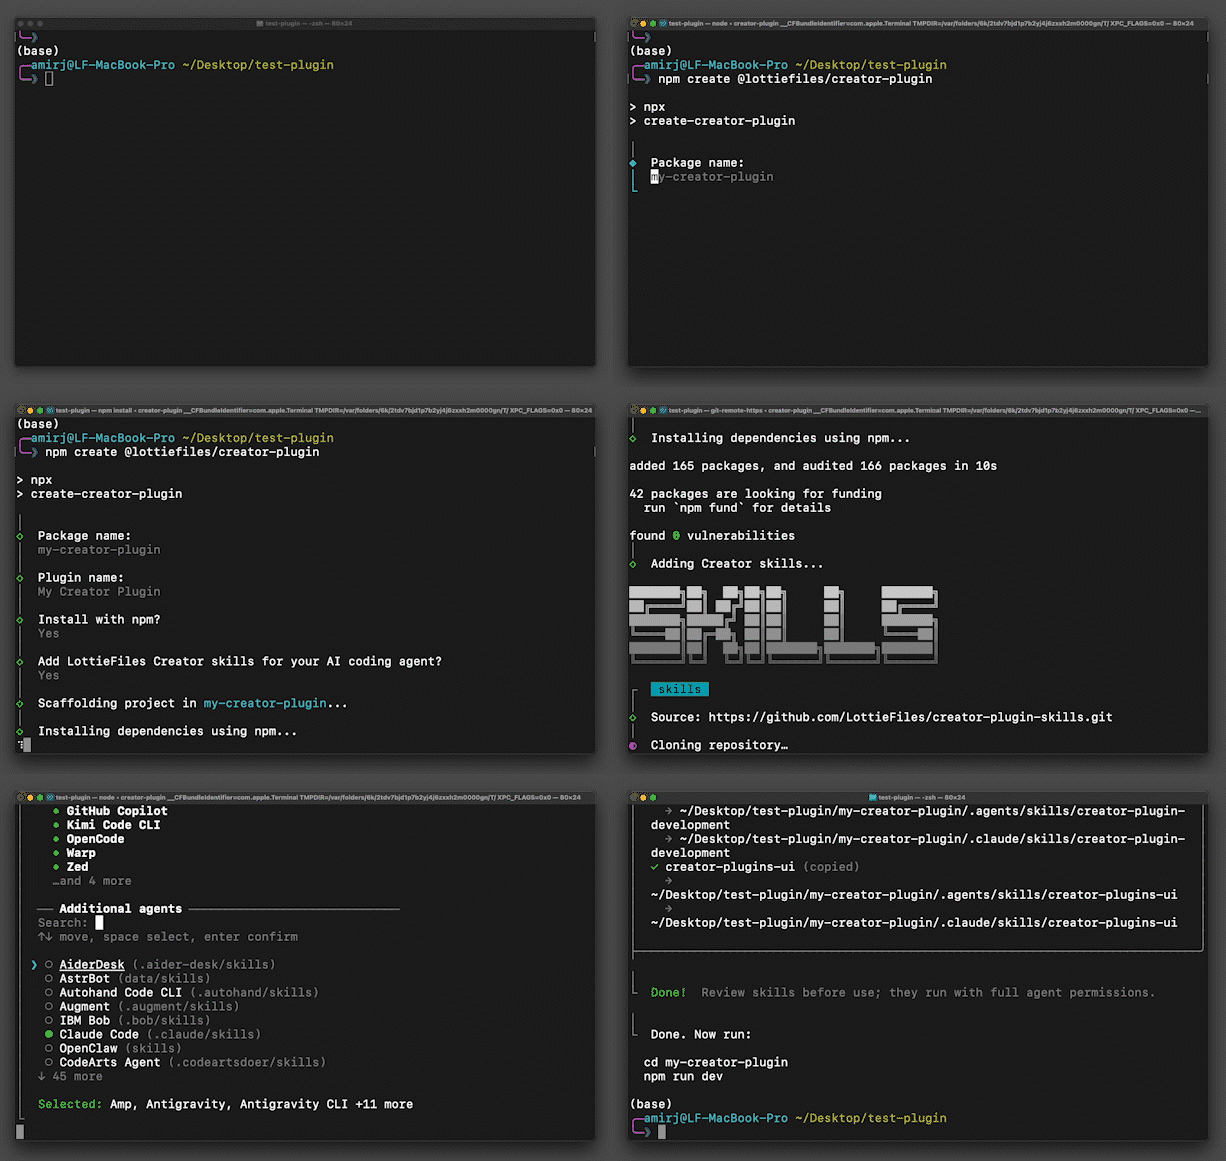
Open Terminal, navigate to the folder, and run the command.
During setup, you’ll be asked a few questions.
For this tutorial, name the plugin:
```
Rectangle Maker
```
Complete the remaining installation prompts.
Once the process finishes, the project will contain everything needed to begin developing your plugin.
* * *
## 3\. Run the Plugin Locally
Navigate into the newly generated plugin project:
```bash
cd my-plugin
```
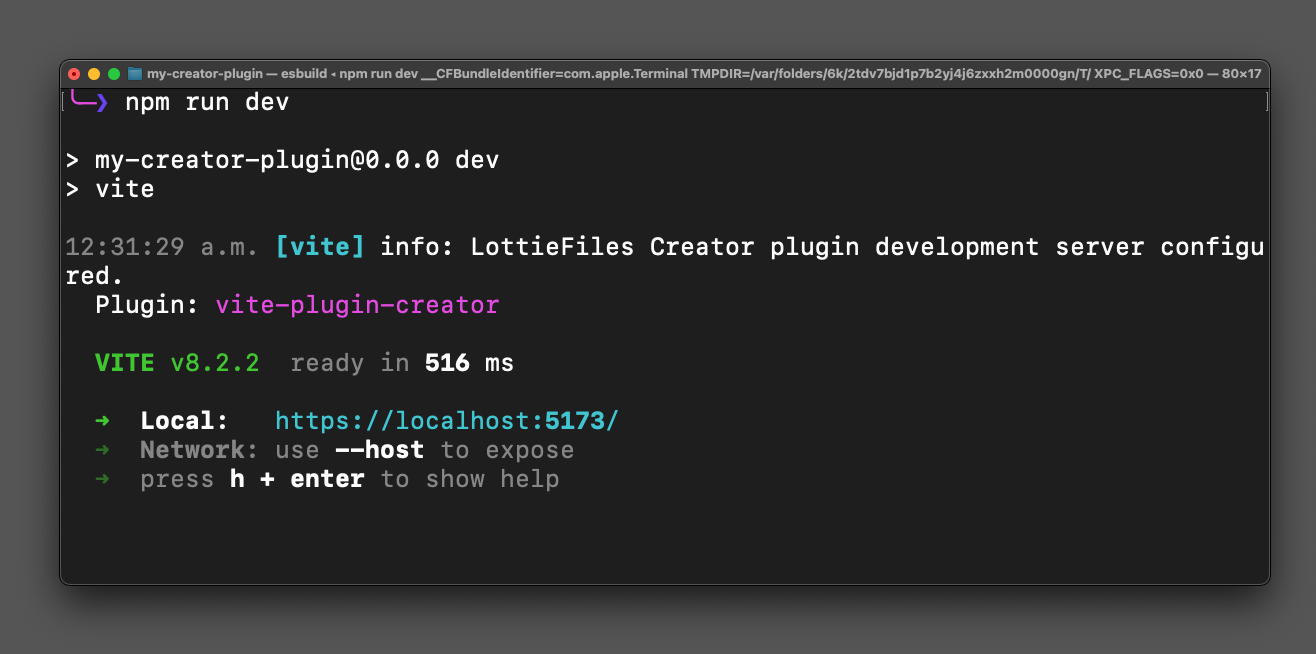
Then start the local development server:
```bash
npm run dev
```
The command will return a local URL for your plugin.
Copy that URL.
* * *
## 4\. Load the Plugin in Lottie Creator
Return to **Lottie Creator** and open the Plugins catalog.
Click the **+** button and enter the local URL generated by the development server.
Creator will now load your plugin.
> **Image placeholder — Animated GIF**
>
> Show Plugins → **+** → paste the local URL → plugin loads in Creator.
At this point, the plugin is running, but it still contains only the starter code.
Now we can begin building it.
* * *
# Build the Plugin UI
## 5\. Open the Plugin in VS Code
Open the project folder in your preferred IDE.
For this tutorial, we’ll use **Visual Studio Code**.
The two main files we’ll work with are:
```
app.tsx
plugin.ts
```
### `app.tsx`
Controls the plugin interface.
### `plugin.ts`
Contains the logic that interacts with Lottie Creator.
> **Image placeholder — Screenshot**
>
> Show the plugin project open in VS Code with `app.tsx` and `plugin.ts` highlighted.
* * *
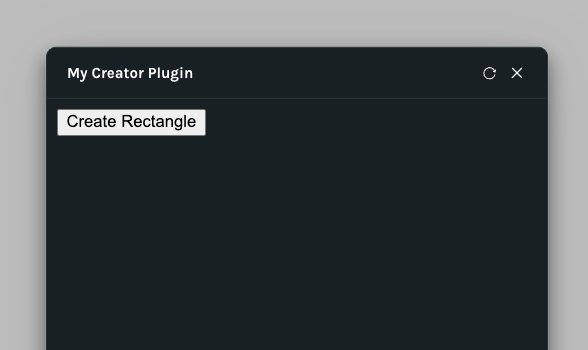
## 6\. Add a Create Rectangle Button
Open:
```
app.tsx
```
The starter project may initially return only a simple text element.
Replace it with a button:
```tsx
export const App = () => {
return (
);
};
```
The button references a function called:
```
createRectangle
```
We haven’t created that function yet, so let’s add it.
* * *
## 7\. Send a Message to the Plugin
Inside `App`, create a new function:
```tsx
const createRectangle = () => {
parent.postMessage(
{
pluginMessage: {
type: "create-rectangle"
}
}, "*"
);
};
```
Your complete UI code now looks like this:
```tsx
export const App = () => {
const createRectangle = () => {
parent.postMessage(
{
pluginMessage: {
type: "create-rectangle"
}
}, "*"
);
};
return (
);
};
```
When the button is clicked, the UI sends a message with the type:
```
create-rectangle
```
The plugin logic will listen for this message and respond to it.
The communication flow is:
```
Button Click
↓
createRectangle()
↓
postMessage()
↓
"create-rectangle"
↓
plugin.ts
```
# Create the Rectangle in Creator
## 8\. Listen for the Message
Open:
```
plugin.ts
```
Remove any starter boilerplate you don’t need.
Then add a message listener:
```tsx
creator.ui.onMessage((msg: any) => {
if (msg.type === "create-rectangle") {
}
});
```
This checks whether the message sent from `app.tsx` has the type:
```
create-rectangle
```
If it does, we can start modifying the Creator scene.
* * *
## 9\. Get the Active Scene
Inside the `if` statement, access the current scene:
```tsx
const scene = creator.activeScene;
```
This gives the plugin access to the scene the user is currently working in.
* * *
## 10\. Create a Shape Layer
Next, create a new shape layer:
```tsx
const layer = scene.createShapeLayer();
```
A shape layer acts as a container.
We can now place shapes, fills, and other properties inside it.
* * *
## 11\. Add a Rectangle
Add a rectangle to the shape layer:
```tsx
layer.createRectangle();
```
At this point, the structure is:
```
Scene
↓
Shape Layer
↓
Rectangle
```
* * *
## 12\. Add a Red Fill
Now add a fill to the same layer:
```tsx
layer.createFill({
type: "SOLID",
color: {
r: 255,
g: 0,
b: 0,
},
});
```
The RGB values:
```
255, 0, 0
```
represent red.
Our structure now becomes:
```
Scene
↓
Shape Layer
├── Rectangle
└── Red Fill
```
* * *
# Center the Rectangle
## 13\. Calculate the Center of the Scene
We want the new rectangle to appear in the middle of the composition.
Get the scene width and divide it by two:
```tsx
const x = scene.size.width / 2;
```
Then do the same for the scene height:
```tsx
const y = scene.size.height / 2;
```
Together:
```tsx
const x = scene.size.width / 2;
const y = scene.size.height / 2;
```
These values represent the center point of the scene.
* * *
## 14\. Position the Shape Layer
Pass the position when creating the shape layer:
```tsx
const layer = scene.createShapeLayer({
position: {
x,
y,
},
});
```
Your rectangle will now be created directly in the center of the scene.
The full creation code looks like this:
```tsx
creator.ui.onMessage((msg: any) => {
if (msg.type === "create-rectangle") {
const scene = creator.activeScene;
const x = scene.size.width / 2;
const y = scene.size.height / 2;
const layer = scene.createShapeLayer({
position: {
x,
y,
},
});
layer.createRectangle();
layer.createFill({
type: "SOLID",
color: {
r: 255,
g: 0,
b: 0,
},
});
}
});
```
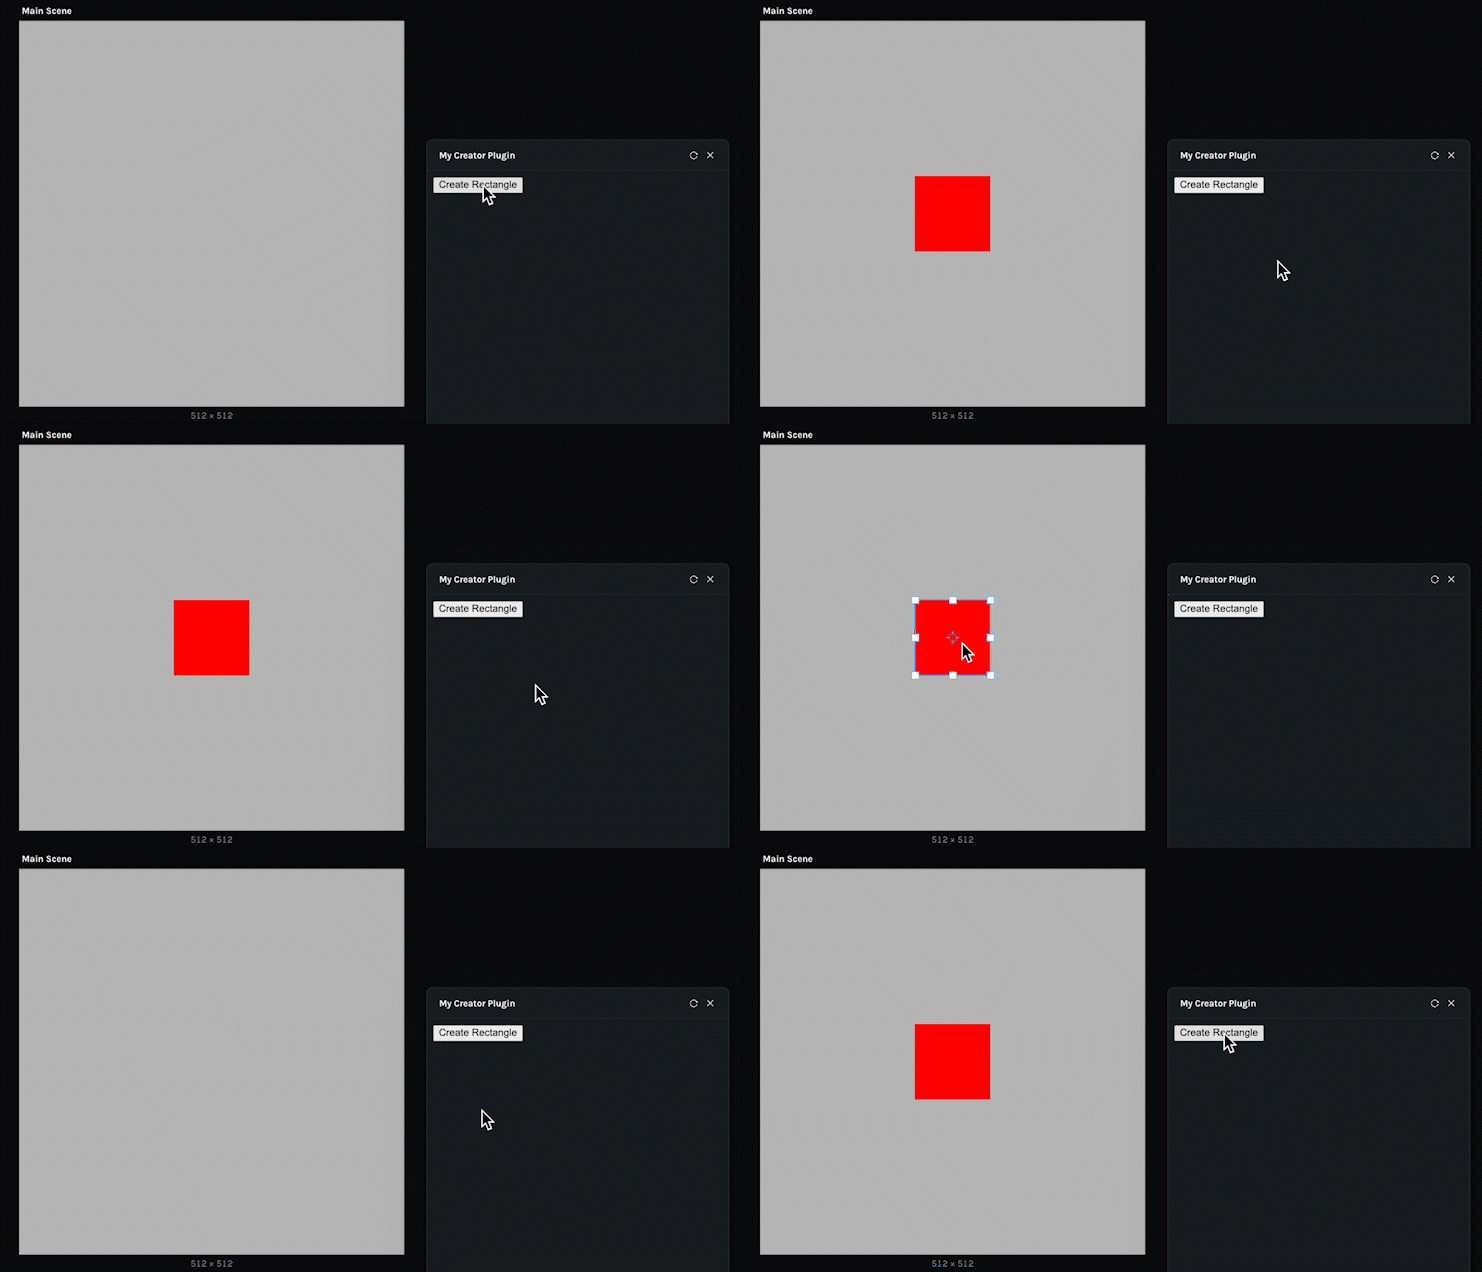
At this point, we already have a working plugin.
But let’s go one step further and animate the rectangle.
* * *
# Animate the Rectangle
## 15\. Add Position Keyframes
Creator allows us to animate properties such as position using keyframes.
Use:
```tsx
layer.position.addKeyframes()
```
This function accepts an array of keyframe objects.
Each keyframe contains:
- A frame number
- A value
Let’s create the first keyframe at frame `0`:
```tsx
{
frame: 0,
value: {
x,
y,
},
}
```
This represents the rectangle’s starting position.
* * *
## 16\. Add the Second Keyframe
Now create another keyframe at frame `100`.
This time, move the rectangle 120 pixels to the right:
```tsx
{
frame: 100,
value: {
x: x + 120,
y,
},
}
```
Combine the two keyframes:
```tsx
layer.position.addKeyframes([
{
frame: 0,
value: {
x,
y,
},
},
{
frame: 100,
value: {
x: x + 120,
y,
},
},
]);
```
This tells Creator:
```
Frame 0
x = center
↓
Frame 100
x = center + 120
```
Creator automatically animates the rectangle between the two positions.
* * *
## 17\. Complete `plugin.ts`
Your full plugin logic now looks like this:
```tsx
creator.ui.show();
creator.ui.onMessage((msg: any) => {
if (msg.type === "create-rectangle") {
const scene = creator.activeScene;
const x = scene.size.width / 2;
const y = scene.size.height / 2;
const layer = scene.createShapeLayer({
position: {
x,
y,
},
});
layer.createRectangle();
layer.createFill({
type: "SOLID",
color: {
r: 255,
g: 0,
b: 0,
},
});
layer.position.addKeyframes([
{
frame: 0,
value: {
x,
y,
},
},
{
frame: 100,
value: {
x: x + 120,
y,
},
},
]);
}
});
```
* * *
## 18\. Test the Animation
Go back to Creator and click:
```
Create Rectangle
```
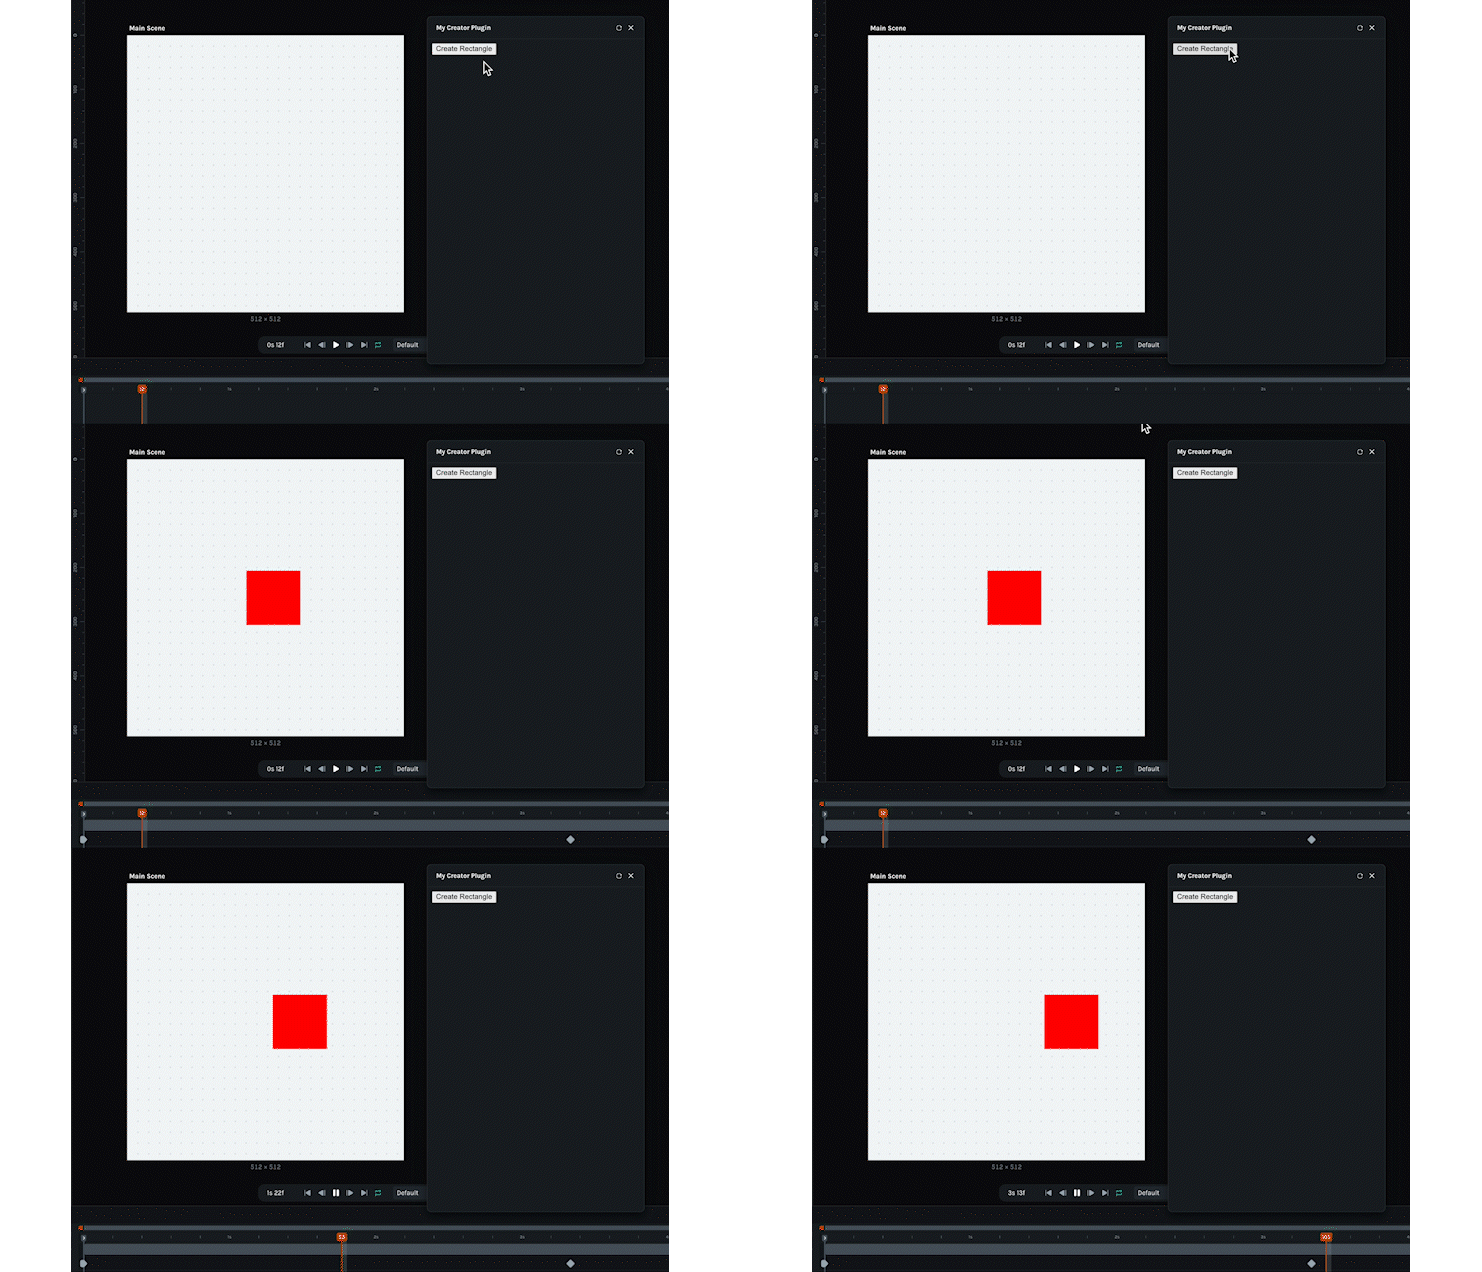
A new red rectangle should appear in the center of the scene.
You should also see its position keyframes in the timeline.
Play the animation.
The rectangle will move horizontally by 120 pixels between frame `0` and frame `100`.
* * *
# How the Plugin Works
The complete architecture is:
```
app.tsx
↓
User clicks Create Rectangle
↓
parent.postMessage()
↓
"create-rectangle"
↓
plugin.ts
↓
creator.activeScene
↓
createShapeLayer()
↓
createRectangle()
↓
createFill()
↓
addKeyframes()
↓
Animated rectangle in Creator
```
The important concept is that the **plugin UI does not directly modify the Creator scene**.
Instead:
```
UI
↓
Message
↓
Plugin Logic
↓
Creator API
↓
Scene
```
This same pattern can be used to build much more complex Creator plugins.
* * *
# What We Built
In this tutorial, we created a plugin that:
- Displays a **Create Rectangle** button
- Sends a message from `app.tsx` to `plugin.ts`
- Accesses the active Creator scene
- Creates a shape layer
- Adds a rectangle
- Adds a solid red fill
- Calculates the center of the scene
- Positions the rectangle in the center
- Adds position keyframes
- Animates the rectangle horizontally
* * *
# What’s Next?
We now have a functioning Creator plugin that can both **create content and animate it**.
In the next tutorial, we’ll add another interactive UI control that lets the user change the color of a selected object directly from the plugin.
That will introduce an important next step in plugin development:
```
Creator Scene
↕
Plugin Logic
↕
Interactive UI
```
Once we can send data in both directions, we can begin building much more useful and interactive Creator tools.
---
## Related Articles
- [How to Create Animations with AI Using Lottie Creator WebMCP](/blog/working-with-lottie-animations/how-to-create-animations-with-ai-using-lottie-creator-webmcp)
- [How to Develop and Publish a Plugin for Lottie Creator](/blog/working-with-lottie-animations/how-to-develop-and-publish-a-plugin-for-lottie-creator)
- [Lottie/dotLottie vs. GIF: Choosing the Right Animation for You](/blog/working-with-lottie-animations/lottie-vs-gif)
- [Introducing Motion Copilot 2.0 in Lottie Creator](/blog/working-with-lottie-animations/introducing-motion-copilot-on-lottie-creator)