# How to Integrate Lottie Animations Into WordPress: Contact Form 7 Plugin
*By George Martsoukos · July 30, 2021*
Discover the process of incorporating Lottie animations on WordPress form using Contact Form 7 (CF7).
---
So far, in previous articles, we’ve examined how to incorporate individual Lottie animations into a web project.
Today, we’ll go a step further and discuss how to integrate Lottie animations with WordPress using [Contact Form 7 (CF7)](https://el.wordpress.org/plugins/contact-form-7/), the most popular WordPress form plugin out there.
## What We’ll be Building
Check a quick video demo of the WordPress form in action and notice the animations that fire each time the submit button is clicked:
[Embedded content](https://www.youtube.com/embed/caYDsjd90V8?feature=oembed)
**Note #1:** for this demo, I’m using CF7’s latest version (5.4) at the time of this writing.
**Note #2:** this tutorial assumes that you are somewhat familiar with WordPress, Contact Form 7, and Lottie Player.
## 1\. Grab a Loading Animation
As a first step, we have to find a loading animation. For this demonstration, we're going to use a [loading animation](https://lottiefiles.com/627-loading-success-failed) with success and failure states created by [Joe Woodward](https://lottiefiles.com/joewoodward).
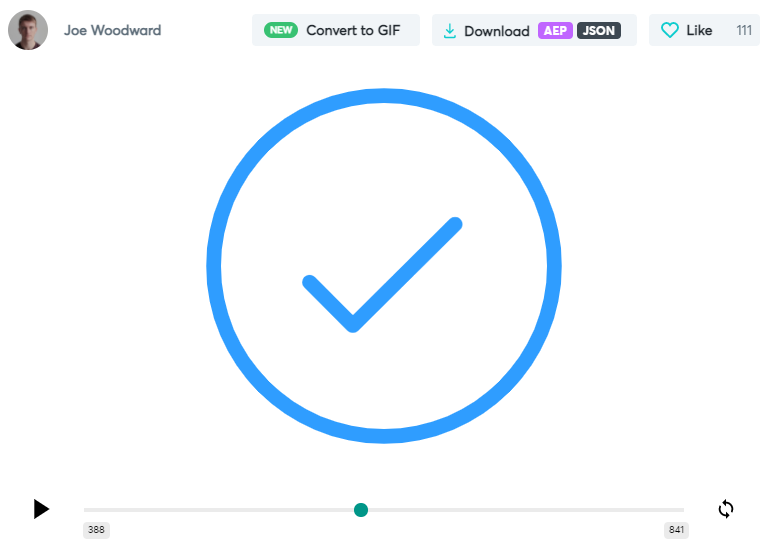
The animation that we'll include into our form
This animation includes 841 frames in total. From these, frames between 0 and 385 play its success state, while frames between 419 and 819 play its failure one. Keep an eye on these numbers as we'll use them later on.
## 2\. Create the Contact Form
Now that we selected the desired animation, let’s create the form from the WordPress dashboard.
We’ll use a combination of Contact Form 7 shortcodes along with some custom HTML.
The form will include:
- Two required `input` elements
- A required `textarea` element
- A submit button
- The `lottie-player` that will initially be hidden.
Here’s the code that we have to add to the Contact Form 7 editor:
```
Contact Us
[text* your-fullname id:your-fullname]
[email* your-email id:your-email]
[textarea* your-message id:your-message]
```
## 3\. Add the CSS Form Styles
Moving on, we’ll apply some form styles. We can either put them in a new CSS file or an existing one.
If we decide to create a new file, we have to enqueue it in the `functions.php` file of our project, like this (your destination folder or the file name may differ depending on your theme):
```
wp_enqueue_style( 'custom', get_template_directory_uri() . '/assets/css/custom.css' );
```
With regards to these styles, we’ll do the following things:
- Position absolutely the `lottie-player`.
- Define the `invisible` class that will visually hide an element. By default, the `lottie-player` will receive this class.
- Hide the CF7’s ajax loader permanently and its output messages temporarily.
- Define the `show` class that will show the appropriate CF7 elements.
Here are all the required styles:
```
/* FORM
–––––––––––––––––––––––––––––––––––––––––––––––––– */
.form-with-lottie-animations .form-submit-wrapper {
position: relative;
display: inline-block;
}
.form-with-lottie-animations .form-submit-wrapper lottie-player {
position: absolute;
top: 50%;
left: 50%;
transform: translate(-50%, -50%);
}
.form-with-lottie-animations .form-submit-wrapper .invisible {
visibility: hidden;
}
/* CF7
–––––––––––––––––––––––––––––––––––––––––––––––––– */
.form-with-lottie-animations .wpcf7-not-valid-tip,
.form-with-lottie-animations .wpcf7-response-output,
.form-with-lottie-animations .ajax-loader {
display: none;
}
.form-with-lottie-animations .show {
display: block;
}
```
Consider the `form-with-lottie-animations` class. This is a class that we’ll give later to the form to isolate its styles and avoid potential conflicts.
These are the minimum necessary styles for making our form compatible with the selected animation. From here, we can also define additional styles. For example, the form layout that appears on the video is created with a [Twenty Twenty](https://el.wordpress.org/themes/twentytwenty/)'s child theme. In the conclusion, there’s a link to a GitHub repo that contains all the theme files.
## 4\. Add the JavaScript
As a next step, we’ll enqueue the required Lottie Player JavaScript file in the `functions.php` file of our project, like this:
```
wp_enqueue_script( 'lottie-player', 'https://unpkg.com/@lottiefiles/lottie-player@latest/dist/lottie-player.js' );
```
Similar to the CSS stuff, we’ll need a place to put our JavaScript code. We can either create a new JavaScript file or use an existing one.
If we decide to create a new file, we have to enqueue it as well in the `functions.php` file of our project, like this (your destination folder or the file name may differ depending on your theme):
```
wp_enqueue_script( 'custom', get_template_directory_uri() . '/assets/js/custom.js', array(), '', true );
```
With regards to the functionality, we’ll do the following things:
- Each time we click on the submit button, its text will disappear, while the `lottie-player` will become visible. At that point, the CF7’s output messages will also disappear.
- We’ll use CF7’s [AJAX events](https://contactform7.com/dom-events/) to play the success or error state of the animation depending on the form submission’s state:
- If the form submission has errors, the `wpcf7invalid` event will fire, and thus the error animation should play. Remember that frames between 419 and 819 describe this animation state.
- On the other hand, if the form submission has been completed successfully and the email has been sent, the `wpcf7mailsent` event will fire, and thus the success animation should play. Remember that frames between 0 and 385 describe this animation state.
- Once the animation finishes, the `lottie-player` will disappear, while the button text will become visible. At that point, the CF7’s output messages will also appear. Also, the animation will be moved immediately to one of its last frames (e.g. 841). On a frame where nothing appears and doesn’t be part of the selected frame ranges.
Here’s the corresponding JavaScript code:
```
/*VARIABLES*/
const formWithLottieAnimations = document.querySelector(
".form-with-lottie-animations"
);
const player = formWithLottieAnimations.querySelector("lottie-player");
const submitBtn = formWithLottieAnimations.querySelector(".wpcf7-submit");
const submitBtnSpan = submitBtn.querySelector("span");
const responseOutput = formWithLottieAnimations.querySelector(
".wpcf7-response-output"
);
const showClass = "show";
const invisibleClass = "invisible";
/*CLICK EVENT*/
submitBtn.addEventListener("click", function () {
submitBtnSpan.classList.add(invisibleClass);
player.classList.remove(invisibleClass);
const notValidEls = formWithLottieAnimations.querySelectorAll(
".wpcf7-not-valid-tip"
);
if (notValidEls.length > 0) {
for (const notValidEl of notValidEls) {
notValidEl.classList.remove(showClass);
}
}
responseOutput.classList.remove(showClass);
});
/*CF7 AJAX EVENT*/
document.addEventListener("wpcf7invalid", function () {
player.getLottie().playSegments([419, 819], true);
});
document.addEventListener("wpcf7mailsent", function () {
player.getLottie().playSegments([0, 385], true);
});
/*LOTTIE PLAYER COMPLETE EVENT*/
player.addEventListener("complete", function () {
this.classList.add(invisibleClass);
submitBtnSpan.classList.remove(invisibleClass);
const notValidEls = formWithLottieAnimations.querySelectorAll(
".wpcf7-not-valid-tip"
);
if (notValidEls.length > 0) {
for (const notValidEl of notValidEls) {
notValidEl.classList.add(showClass);
}
}
responseOutput.classList.add(showClass);
this.seek(841);
});
```
Of course, you can take this code and optimize it by using additional CF7’s AJAX events or adding extra functionality.
## 5\. Call the Contact Form
Last but not least, we’ll include the generated CF7 shortcode in the desired part of our project:
```
[contact-form-7 id="5" title="Contact Form With Lottie Animations" html_class="form-with-lottie-animations"]
```
Notice the familiar `form-with-lottie-animations` class added via the `html_class` attribute.
## Conclusion
That’s all, folks! In today’s tutorial, we covered a process for incorporating Lottie animations into Contact Form 7. Hopefully, you enjoyed this exercise and that gave you some inspiration about how to include Lottie animations in your WordPress sites.
As I said earlier, for this exercise I worked with a child theme of Twenty Twenty. You can grab all the demo files at this [GitHub repo](https://github.com/geomarts/lottie_animation_wpcf7).
If you’re interested in more “how-to" tutorials about WordPress and Lottie animations, let me know in the comments below.
As always, thanks a lot for reading!
---
## Related Articles
- [How to Create Animations with AI Using Lottie Creator WebMCP](/blog/working-with-lottie-animations/how-to-create-animations-with-ai-using-lottie-creator-webmcp)
- [How to Build Your First Lottie Creator Plugin: Create and Animate a Rectangle](/blog/working-with-lottie-animations/how-to-build-lottie-creator-plugin-create-and-animate-a-rectangle)
- [How to Develop and Publish a Plugin for Lottie Creator](/blog/working-with-lottie-animations/how-to-develop-and-publish-a-plugin-for-lottie-creator)
- [Lottie/dotLottie vs. GIF: Choosing the Right Animation for You](/blog/working-with-lottie-animations/lottie-vs-gif)