Lottie is a widely used animation format for incorporating vector animations into both web and mobile applications. Despite its small file size, Lottie provides a wide range of animation capabilities, making it a convenient choice for any design project.
Lottie animations are built on an open-source JSON format, which allows for effortless and fast manipulation at runtime. For instance, modifying the animation colors in real-time can be easily accomplished with CSS or JavaScript.
This article will delve into the process of using CSS to style a Lottie animation according to light and dark mode.
#LottieTip: Add layer ID and class names using Lottie Editor to create a light and dark mode animation using CSS. 🌓 pic.twitter.com/rTHKJsVyrN
— LottieFiles (@LottieFiles) January 8, 2024
1. Finding an animation
To begin, we'll browse through the LottieFiles public animation library to select a suitable animation.
Personally, I'm fond of the “Up and Down : Loading Animation” created by Brayan Motion.
We will adjust the color of the two circles depending on whether the device is set to dark or light mode.
2. Prepare animation using Lottie Editor
Lottie Editor comes with advanced functionalities, including the option to assign HTML attributes such as ID and class names to shapes/layers in an animation. This allows us to use CSS or JavaScript to target these IDs/classes when embedded in a webpage.
Open the animation with Lottie Editor by clicking the “Edit Layer Colors” button on the animation preview page.
Navigate to the layers panel and select the 'Circle2' layer. Proceed to access the attributes section from the right-hand panel, and assign 'circle2' as the designated Layer ID. Repeat this process for the 'Circle1' layer.
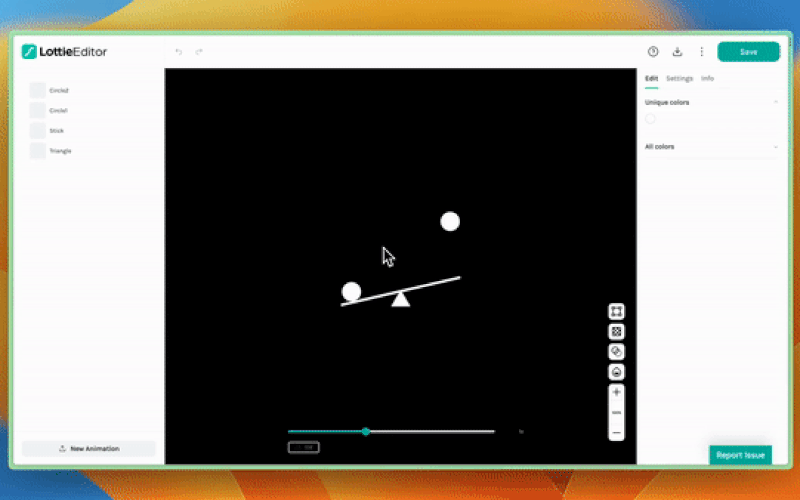
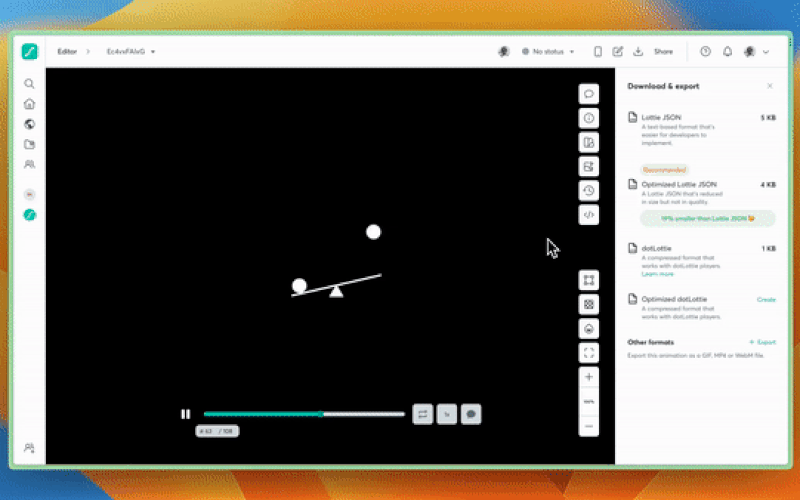
Once you add IDs to the layers, save the animation to your workspace, enable, and copy the asset link from the Hand off & Embed section.
3. Embedding animation & styling for dark mode
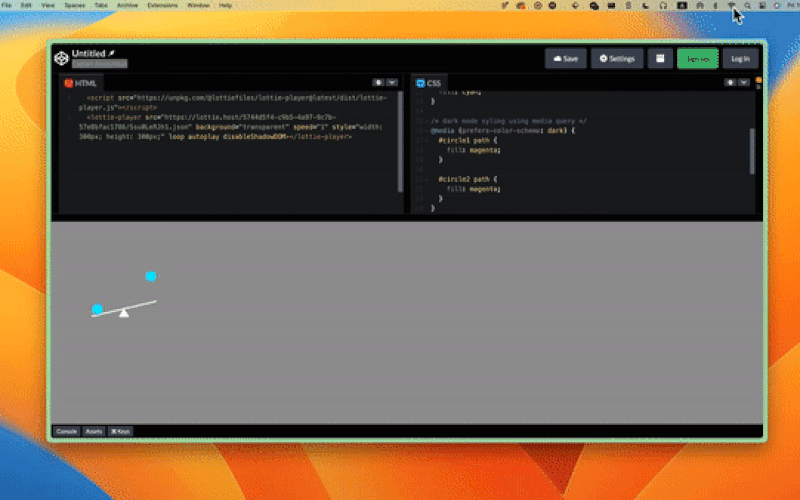
For this demo, we will use CodePen as our code editor and use Lottie-player to embed this animation. Create a new Pen in CodePen and paste the embed code below to the HTML section.
<script src="https://unpkg.com/@lottiefiles/lottie-player@latest/dist/lottie-player.js"></script>
<lottie-player src="your asset link" background="transparent" speed="1" style="width: 300px; height: 300px;" loop autoplay disableShadowDOM ></lottie-player>
Now paste the asset link you copied from LottieFiles workflow into scr attribute of lottie-player component by replacing your asset link.
Next we are going to write some CSS to target for default (light) mode. We will do this by writing some CSS that targets the layer ID followed by path.
/* set a background color so we can see the white animation */
body {
    background: #999;
}

/* default styling (light mode) */
#circle1 path{
  fill:cyan;
}

#circle2 path {
  fill: cyan;
}
You should be able to see the color change of the circle immediately on the preview panel.
To change the circle layers’ color based on dark mode or light mode, we can use the prefers-color-scheme media query.
/* default light mode styles */
#circle1 path{
  fill: green;
}

#circle2 path {
  fill: green;
}

/* dark mode syling using media query */
@media (prefers-color-scheme: dark) {
    #circle1 path{
      fill:magenta;
    }

    #circle2 path {
      fill: magenta;
    }
}
When you switch your computer from light mode to dark mode, you can now see the color change in the animation.
For easy switching between dark and light modes, we will add a button to the page that will toggle .dark-mode class on the page body. The final demo will include the CSS for .dark-mode class and JavaScript to handle the toggle button.
And that's a wrap! As you can see, it’s super easy to edit the Lottie animation according to the light and dark mode.
If you want to learn more tricks, check out our blog on how to customize the colors of your animation using CSS or learn more about how to do some seamless and easy edits using Lottie Editor.
We hope these animation editing ideas inspired you. Start experimenting and exploring with any of the tens of thousands of free animations on LottieFiles.
Happy Designing.