It finally happened – you’ve found the perfect Lottie animation for your website, app or marketing collateral. There’s just one problem: perhaps the colors are wrong, the text is wrong, it’s playing too fast or its dimensions are too small.
No worries. Lottie Editor makes it easy to edit any Lottie animation provides a great user experience. Use it to tweak dimensions, layers, playback speed, frame rate, colors and more – even if you aren’t a designer.
Watch the video: How to edit animations with Lottie Editor
Learn how to edit your animations and embed them in websites, newsletters, social media, and more. Watch the tutorial below or scroll down for a written version. If you’d like to follow along, you can duplicate the design assets from the tutorial.
1. Prepare your Lottie animation
If you don’t already have a Lottie animation – but want to use the cool good morning animation to that you want to change some elements on it. It just takes a few steps:
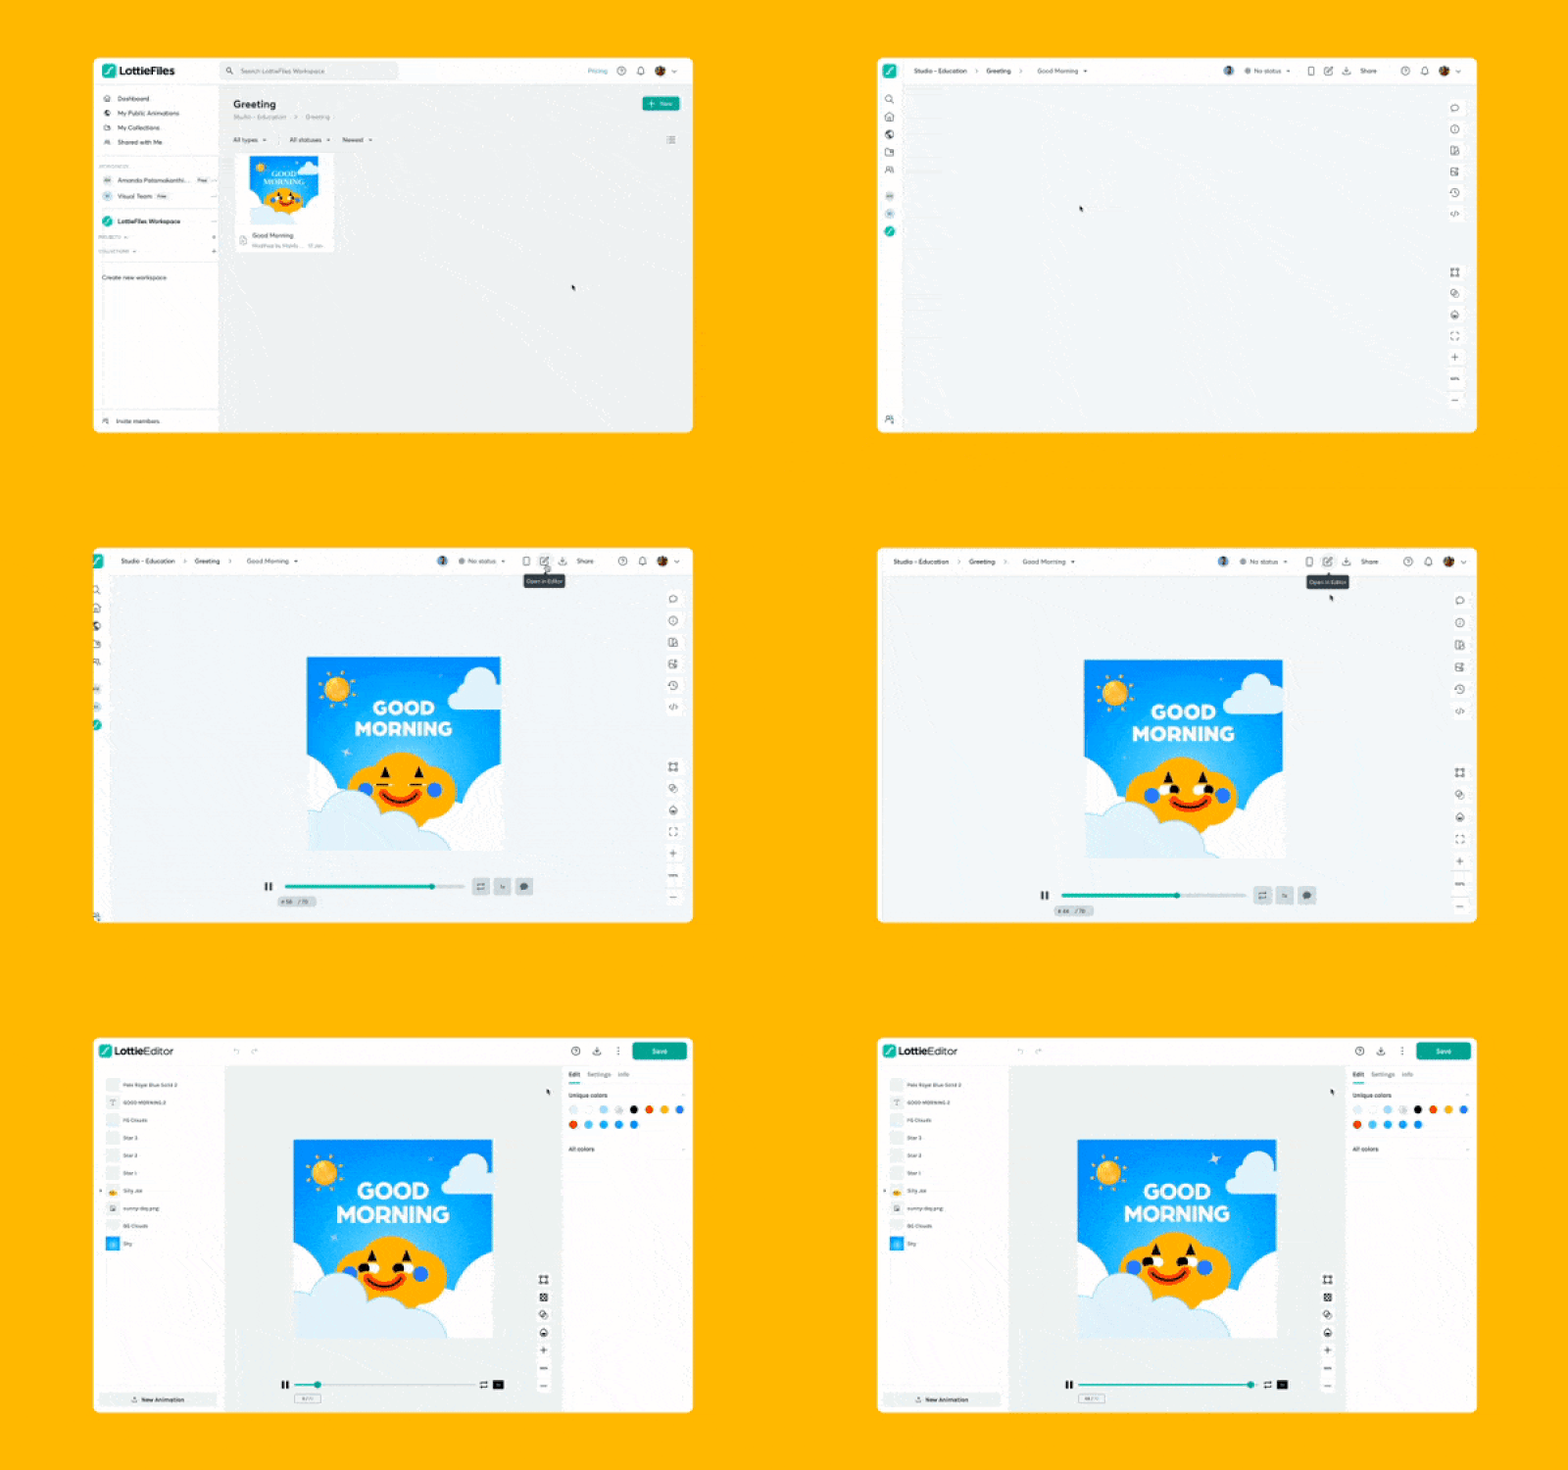
- Access the LottieFile Platform via “My Dashboard”
- Drag and drop the animation to the dashboard
- Select the animation that you want to edit
- Click the “Open in Editor” icon
Alternatively, you could also choose from thousands of free animations on LottieFiles. Download, edit and use these animations in your personal and commercial projects.
2. Edit your animation with Lottie Editor
Once Lottie Editor loads your animation, you’ll be able to edit these properties:
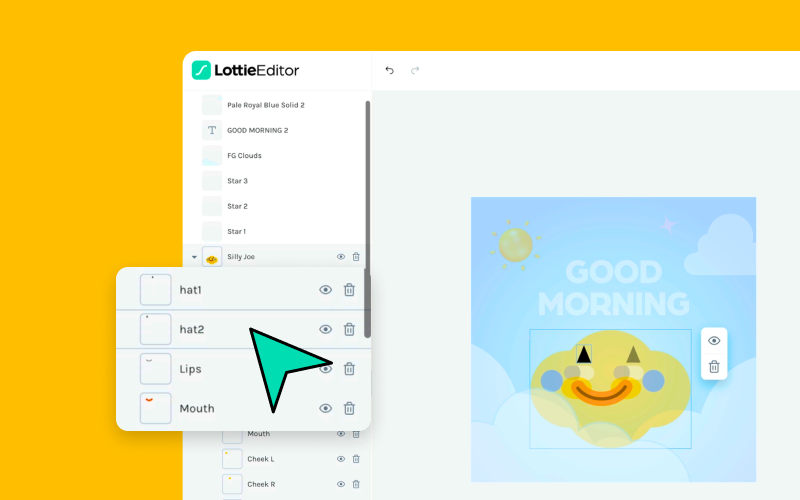
- Layers - If you have elements on different layers, you can rearrange them by moving layers from front or back. You can also hide or unhide or delete unwanted layers.
- Colors - You can change the colors of the elements in your animation or change the background color. Change with one solid color, outline or try out a gradient effect.
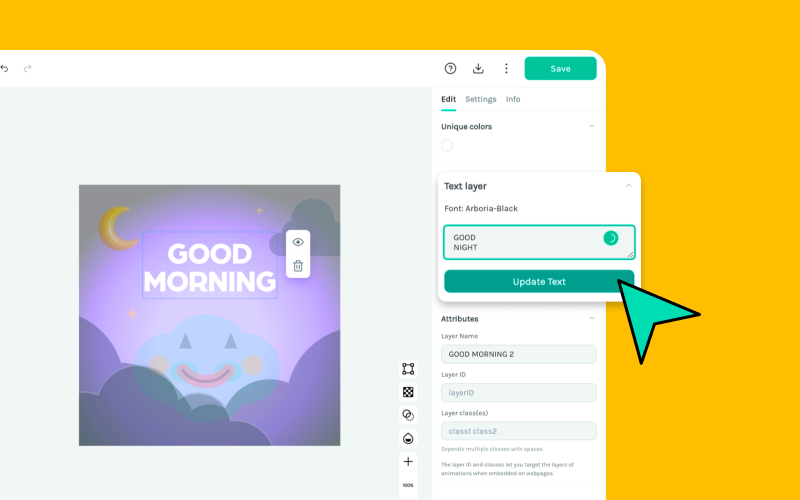
- Text - If your animation is exported with a global font setting, you can change the text within the animation by simply clicking the layer and editing it.
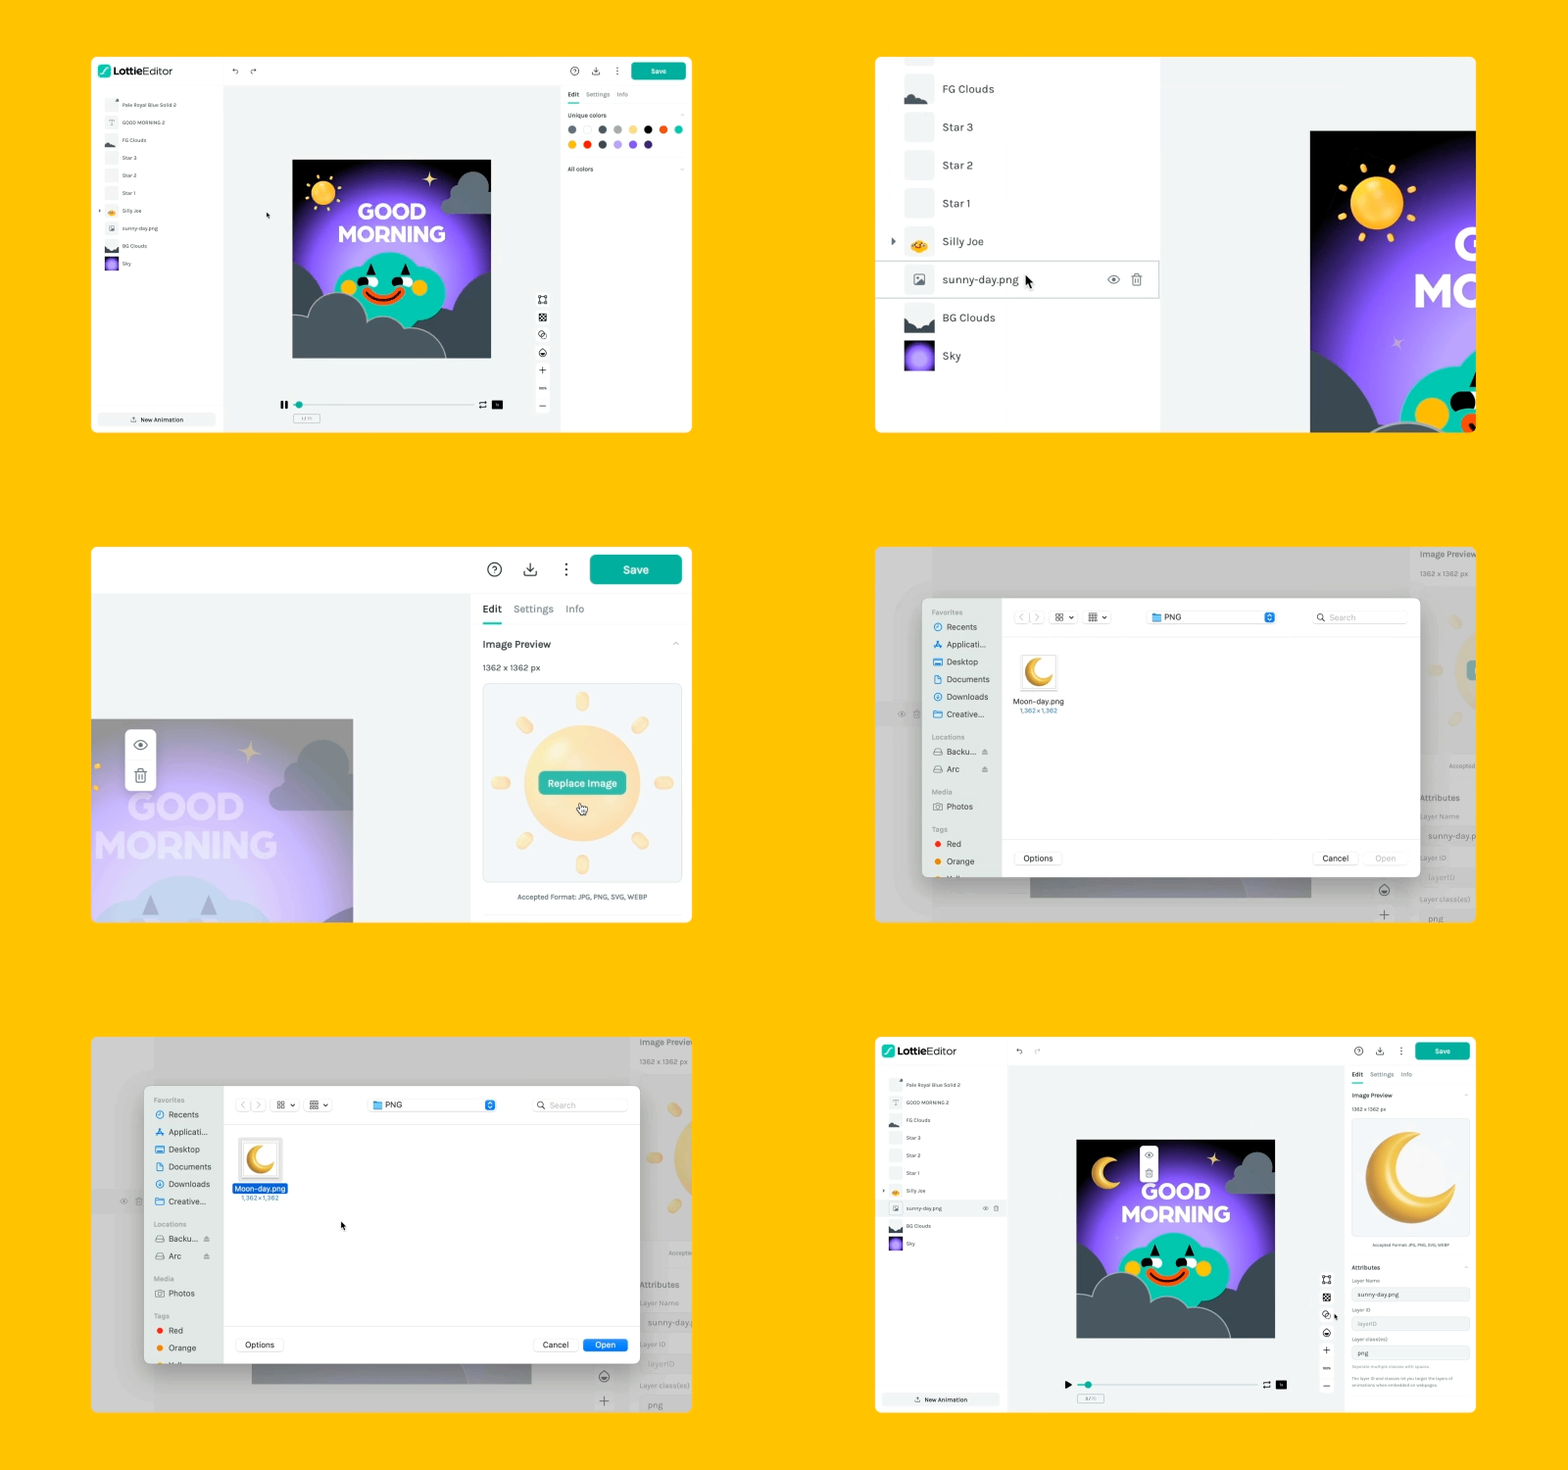
- PNG images - Replace the old image with a new image. If you want you can replace by downloading a PNG image from millions of design assets available in IconScout
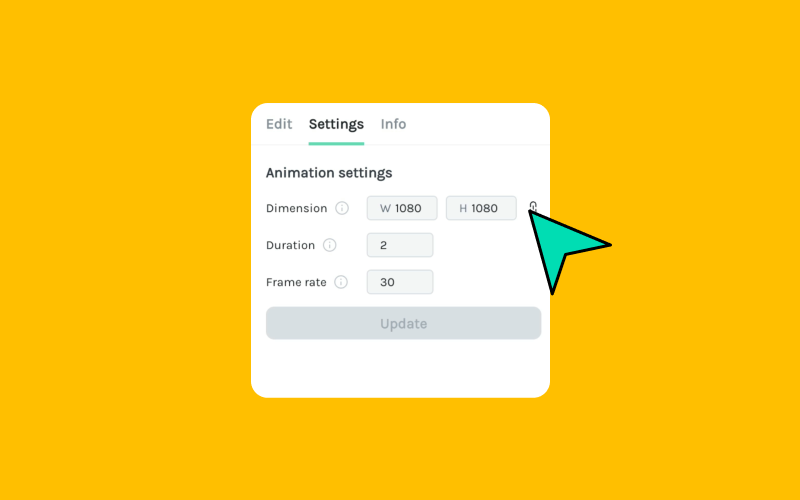
- Dimensions - You can change the width and height of your animation by editing its dimensions.
- Duration - This refers to the length of your animation in seconds.
- Frame rate - This refers to the number of individual images (i.e. frames) that are shown per second. At higher frame rates, the animation will seem smoother.
- Playback speed - You can change this to adjust how fast the animation plays.
Play around with these settings, or check out the video tutorial above to see how this works in action.
3. Save your edited animation as a Lottie

Almost done! But first, let's save your edited animation. By clicking the “Save” button, you will be presented with two options:
- Save as new animation: Keep the original animation intact while allowing you to view both the new and original versions in your folder
- Save changes: Replace the original version with the new edits. The older version will still be accessible on the LottieFiles Platform under "Version History" if you want to go back and preview it.
The animation will be automatically saved as a JSON file. The saved animation can be downloaded or exported as Lottie JSON, dotLottie or any other format that you wish from the LottieFiles Platform.
5. Use your Lottie animation in websites, mobile apps, newsletters, social media and more

It’s easy to embed your Lottie animation in your website:
- Head to your private animation dashboard and click on your animation.
- Enable Asset Link from “Handoff & Embed” and copy paste the link provided under “Asset link”.
- Alternatively, you can use Lottie Editor to export your animation as a JSON file and upload it to your own server.

- Then, generate a Lottie Web Player embed code by pasting the link to your JSON file.
- You can embed this HTML code in WordPress, Shopify, Webflow, Squarespace, Wix or any other website.
- To learn more, check out this guide to adding Lottie animations to websites with Lottie Web Player.

Unfortunately, newsletters and social media platforms like Facebook and Instagram currently don’t support Lottie animations. No worries, you can still add motion to your marketing collaterals.
- Head to your private animation dashboard and click on your animation.
- Click “Convert to GIF”.
- Alternatively, head directly to the Lottie to GIF tool and drag and drop your Lottie JSON file.
- Once you’ve downloaded your GIF, you can insert it in your newsletters and social media posts.
We hope this has inspired you to try your hand at editing animations, even if you don’t know anything about motion design. Start by playing around with the thousands of free animations on LottieFiles – we can’t wait to see what you come up with!
Want to add motion to your life? Check out how to add Lottie animations anywhere, or browse all our video tutorials on the LottieFiles YouTube channel!


