This blog was originally published on 14 August 2022. It has since been updated as of 3 December 2025.
Have a web page you’d like to spruce up?
It’s easy to add engaging animations to your site with Lottie. Lottie animations are super small file formats, so you can add pizzazz without slowing down your site. Plus, they can be scaled up or down without losing quality.
So where do you get Lottie animations? Perhaps you’ve got an animator who has already created a bespoke animation for you, and exported it from Adobe After Effects using the LottieFiles plugin. If you don’t, you can browse thousands of free animations on LottieFiles. Customize them with the Lottie Editor or Color Palette feature to suit your brand or design, then use them in your personal and commercial projects!
There are tons of ways to add Lottie animations to your projects – with code, without code, or through LottieFiles’ integrations with various platforms.
In this article, we’ll go through how to add Lottie animations with (HyperText Markup Language) HTML. You can use this on any web page, blog or platform that allows you to edit HTML. You’ll learn:
- How to add Lottie animations to a web page with HTML
- How to change the background of your Lottie animations
- How to customize the appearance of the Lottie player
1. Add the script tag for the LottieFiles web player component
LottieFiles now recommends the dotLottie Player, exposed on the web as the <dotlottie-wc> custom element. It’s built on top of the new @lottiefiles/dotlottie-web runtime and works with both classic Lottie JSON and the newer .lottie format.
To use it on any page, load the web component from a CDN in your HTML (typically inside the <head> tag, but anywhere before your markup is fine):
<script
  src="https://unpkg.com/@lottiefiles/dotlottie-wc@latest/dist/dotlottie-wc.js"
  type="module"
></script>
2. Get the URL of the animation
The dotLottie Player works with:
- Lottie JSON files (.json)
- dotLottie bundles (.lottie), which can contain multiple animations, assets and themes in a single compressed file.
There are two common ways to get the URL of your animation:
- Host it yourself – Upload your .json or .lottie file to your own hosting (for example, your CMS or a static file host) and copy the public URL.
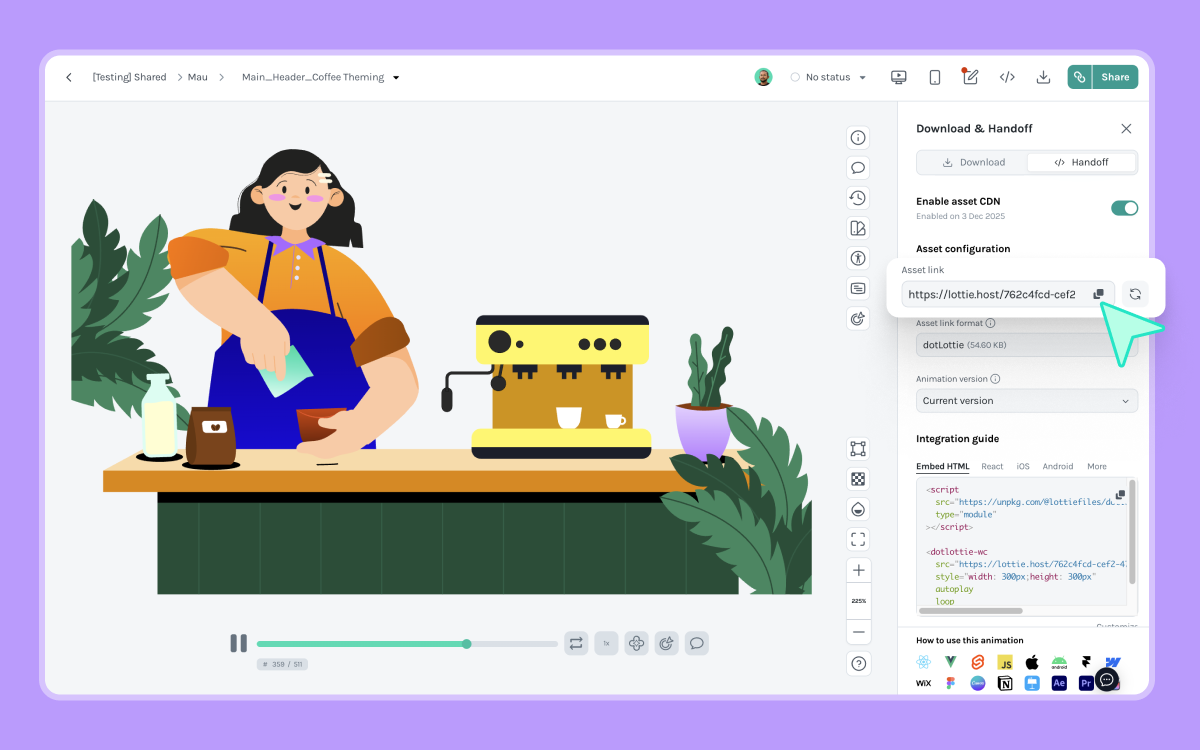
- Use LottieFiles hosting – On LottieFiles, you can upload or pick an animation and grab a dotLottie / Lottie JSON URL directly. The Web Player tool lets you paste this URL and generate ready‑to‑use HTML for <dotlottie-wc>.
3. Add the <dotlottie-wc> element pointing to the URL of the animation
Once you have the animation URL, drop a <dotlottie-wc> element into your page’s HTML.
Replace <URL HERE> with the URL of your .json or .lottie file:
<dotlottie-wc
  src="<URL HERE>"
  speed="1"
  style="width: 300px; height: 300px"
  mode="forward"
  loop
  autoplay
></dotlottie-wc>
That’s it! Save and preview your page to see the animation.
If you’re working with a .lottie file that contains multiple animations or themes, you can also use attributes like animationId and themeId to pick which animation and theme to display.
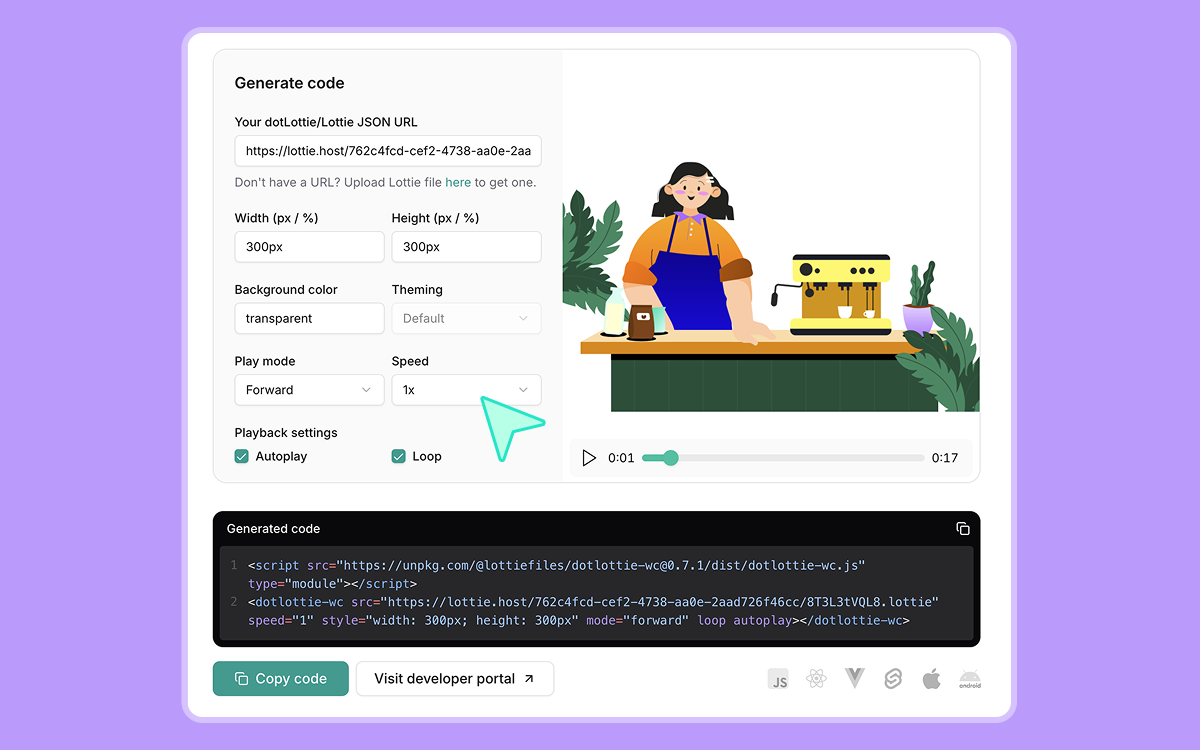
Automatically generate the HTML code
The Lottie Web Player tool now generates code for the new dotLottie web component. Paste in your Lottie JSON or dotLottie URL, adjust size, background color, playback mode, loop and autoplay options, and it will output a <script> tag plus a <dotlottie-wc> snippet you can paste straight into your HTML.
The generated code will look something like:
<script
  src="https://unpkg.com/@lottiefiles/dotlottie-wc@latest/dist/dotlottie-wc.js"
  type="module"
></script>

<dotlottie-wc
  src="https://lottie.host/your-animation-url.lottie"
  speed="1"
  style="width: 300px; height: 300px"
  mode="forward"
  loop
  autoplay
></dotlottie-wc>
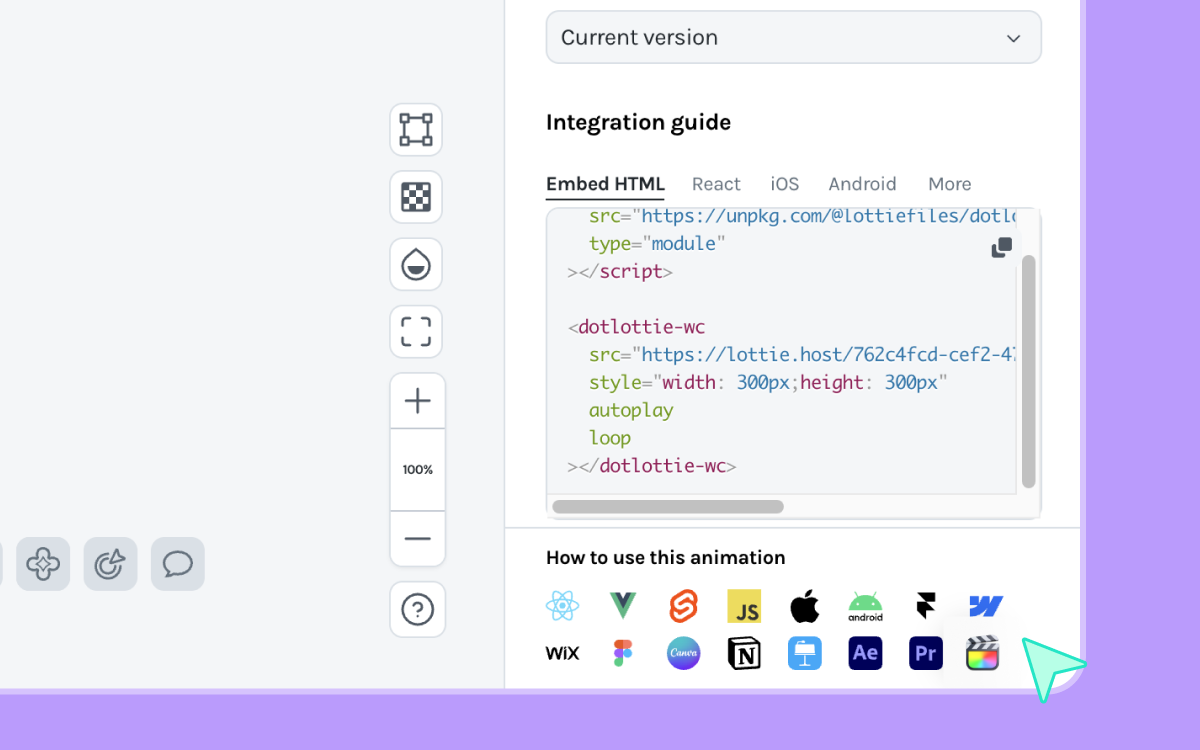
You can also click Use this animation in <html> on any animation page to automatically generate the code.
Customize how the animation plays
The <dotlottie-wc> component accepts a set of attributes that control playback. Under the hood, it forwards these to the @lottiefiles/dotlottie-web player, so you get fine‑grained control with simple HTML.
Some of the most useful attributes are:
- src – The URL to your Lottie JSON or dotLottie file.
- autoplay – If present, the animation starts playing as soon as it loads.
- loop – If present, the animation loops forever instead of stopping at the end.
- speed – Controls playback speed (default is 1). Use values less than 1 (e.g. 0.5) to slow it down, or greater than 1 (e.g. 2) to speed it up.
- mode – Controls how the animation plays. For example:
- "forward" – plays from first frame to last.
- "bounce" – plays forward, then backwards, and repeats.
- backgroundColor – Sets the animation’s canvas background color. It accepts 6‑ or 8‑digit hex values such as "#FFFFFF" (white) or "#00000000" (transparent).
For more advanced scenarios, dotLottie also supports:
- segment – Play only a portion of the animation by passing a [startFrame, endFrame] segment.
- marker – Start playback from a named marker defined inside the animation.
- animationId – Choose which animation to play when your .lottie file contains multiple animations.
- themeId – Switch between themes defined in a themed .lottie file.
- State machines – Use stateMachineId to start a state machine from your dotLottie file.
These options let you fine‑tune how your animation behaves without writing any JavaScript.
If you want to show a small JavaScript example (where the article currently mentions JS for autoplay), you can add this short snippet:
You can also control the animation with JavaScript via the underlying dotLottie instance:
<dotlottie-wc
  id="hero-animation"
  src="<URL HERE>"
  autoplay
></dotlottie-wc>

<script>
  const el = document.getElementById('hero-animation');

  el.addEventListener('load', () => {
    const player = el.dotLottie; // underlying dotLottie instance
    player.setSpeed(1.5);
    // player.play(), player.pause(), player.stop(), etc.
  });
</script>
The dotLottie instance exposes methods like play(), pause(), stop(), setSpeed(), setLoop() and more for advanced control.
Customizing the appearance of the player
Because <dotlottie-wc> is a custom HTML element, you can style it with regular CSS the same way you would a <div> or <img>. A few common patterns:
Size & layout via CSS
<style>
  dotlottie-wc.hero-animation {
    display: block;
    width: 300px;
    height: 300px;
    margin: 0 auto;    /* center on the page */
  }
</style>

<dotlottie-wc
  class="hero-animation"
  src="<URL HERE>"
  autoplay
  loop
></dotlottie-wc>
Background color via attribute
<dotlottie-wc
  class="hero-animation"
  src="<URL HERE>"
  autoplay
  loop
  backgroundcolor="#ff00ff"
></dotlottie-wc>
Wrap in a styled container
<dotlottie-wc style="width: 300px; height: 300px" src="<URL HERE>" loop autoplay></dotlottie-wc>
If you need visible UI controls (custom play, pause, scrubber, etc.), the recommended approach with dotLottie is to build your own buttons and hook them up to the player’s JavaScript API (play(), pause(), setSpeed(), and so on).
For advanced features (multi‑animation .lottie files, theming, state machines, and interactivity), check out the dotLottie Player docs and the dotLottie Web GitHub repo:
- dotLottie Player docs: https://developers.lottiefiles.com/docs/dotlottie-player/ developers.lottiefiles.com
- dotLottie Web repository: https://github.com/LottieFiles/dotlottie-web
Boost web performance with dotLottie
Boost your web animations' performance with dotLottie. dotLottie is an evolution of the Lottie format created to address some limitations of the original Lottie format. This file format gives developers a more efficient way to implement animations as it uses ZIP tech for compression, which reduces your file size up to 80% more than a standard Lottie. It's essentially a subset of Lottie that can include multiple Lottie animations, images, and other assets all packaged in a single file and still uses the .lottie extension.
As this optimized format compresses multiple animations and bundles them with assets, it results in faster load times and improved page performance. Additionally, with multi-animation support and dynamic theming capabilities, dotLottie makes managing web animations easier than ever. Developers will appreciate the reduced bandwidth requirements and simpler workflows, ensuring animations run smoothly across devices without compromising quality.
It’s easy to add animation to your site
As you can see, adding Lottie animations with HTML is simple – it’s as easy as copying and pasting automatically generated code.
But you don’t have to stop there. There are tons of other stuff you can do with Lottie animations, HTML and a bit of JavaScript. You can interactivity to your animations – for example, make them sync to user scrolling, chain multiple animations or trigger animations after a certain number of clicks. Find out more about setting up interactive animations here, or check out the Lottie Web Player Github page for other advanced customizations.
We can’t wait to see what you create with Lottie!