Animations no longer need to be static or linear. With State Machines, you can create dynamic, interactive motion that responds directly to user input. Instead of a simple start-to-end play-through, your animations can adapt based on conditions; whether it’s a click, a toggle, or the completion of another animation.
In this tutorial, we’ll guide you step by step through building a boolean example of a check-in animation in Lottie Creator; showing you how to define states, set transitions, and bring interactivity to life.
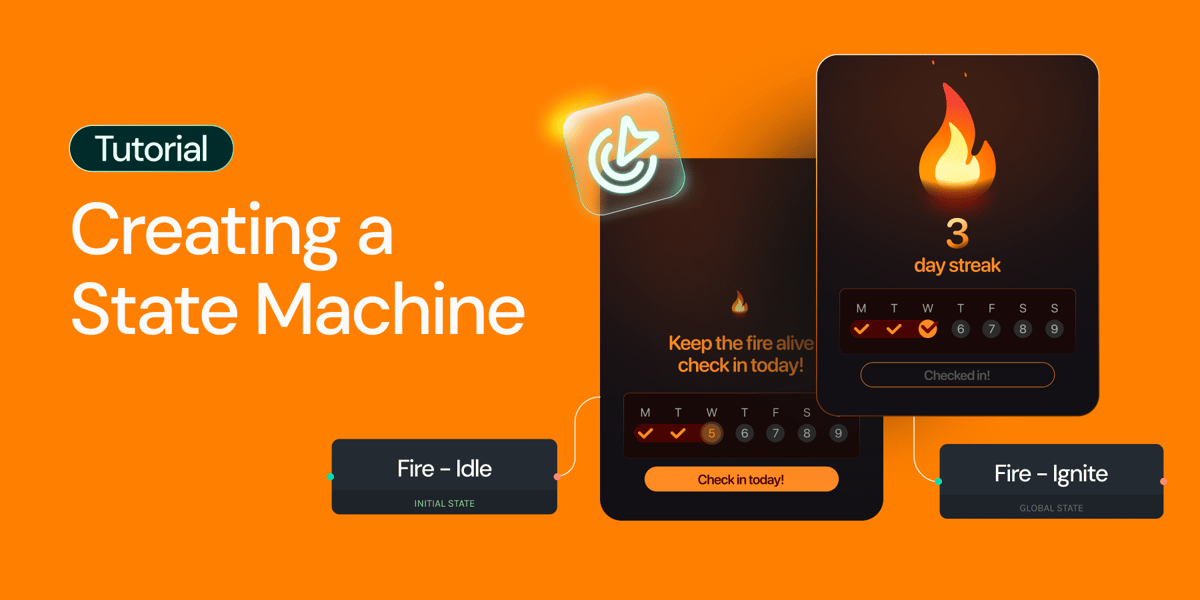
Step-by-step: Creating an interactive check-in animation
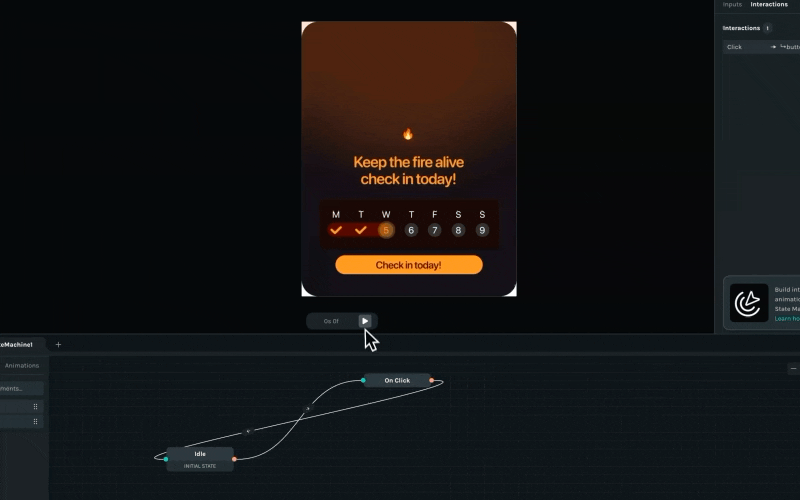
This is the animation we will be working on in Lottie Creator. We've also included the remix link at the end of this tutorial.
Step 1:
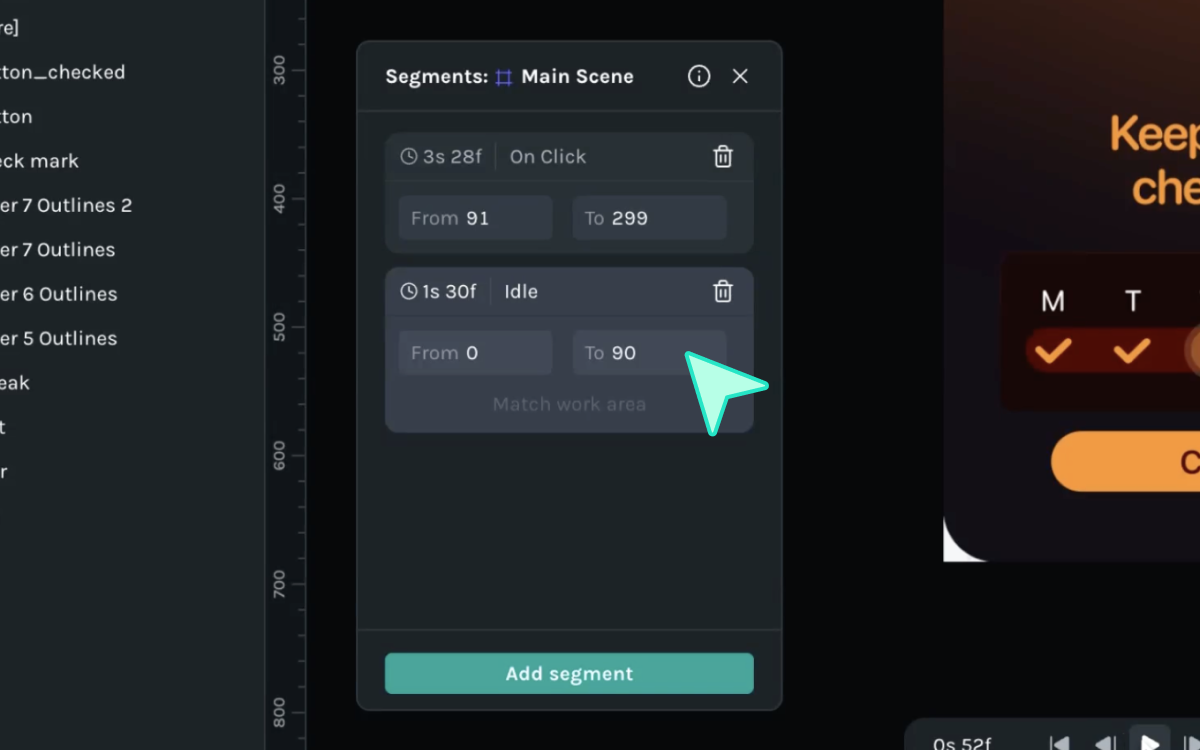
Add segments to your animation.
Step 2:
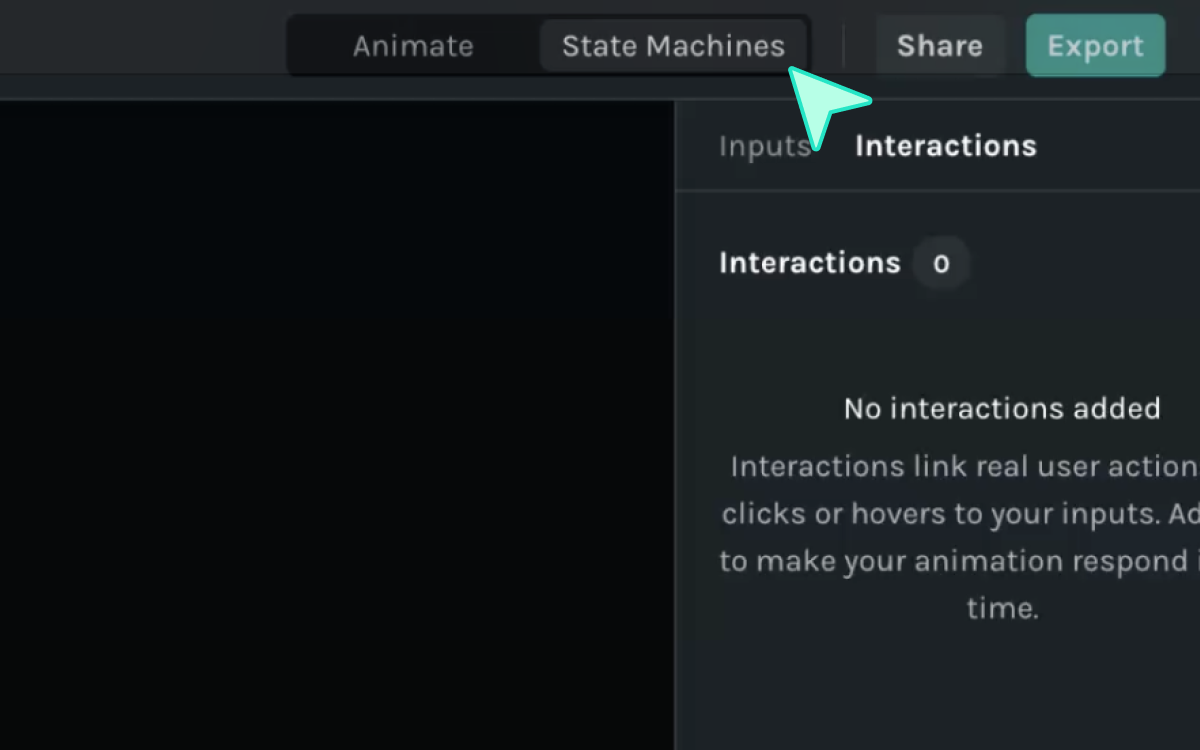
Click on the State Machines tab on the top right corner of Lottie Creator.
Step 3:
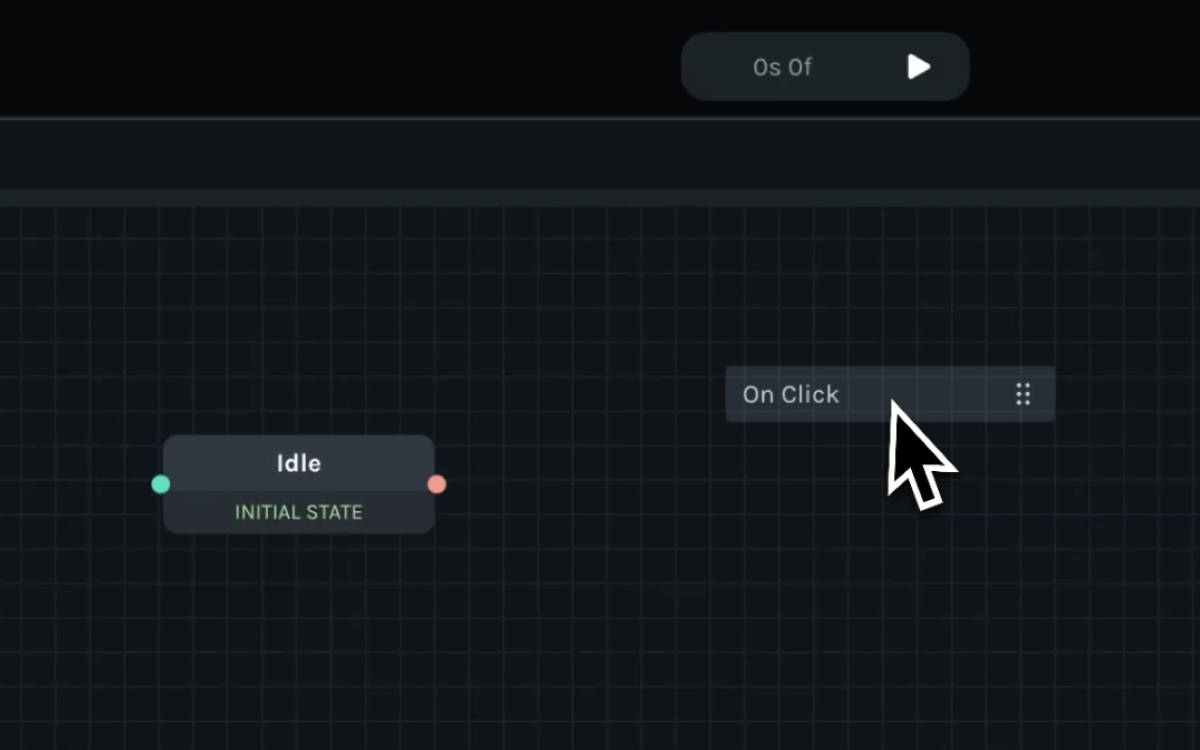
Bring both the segments (Idle and On Click) in the State Machines area.
Step 4:
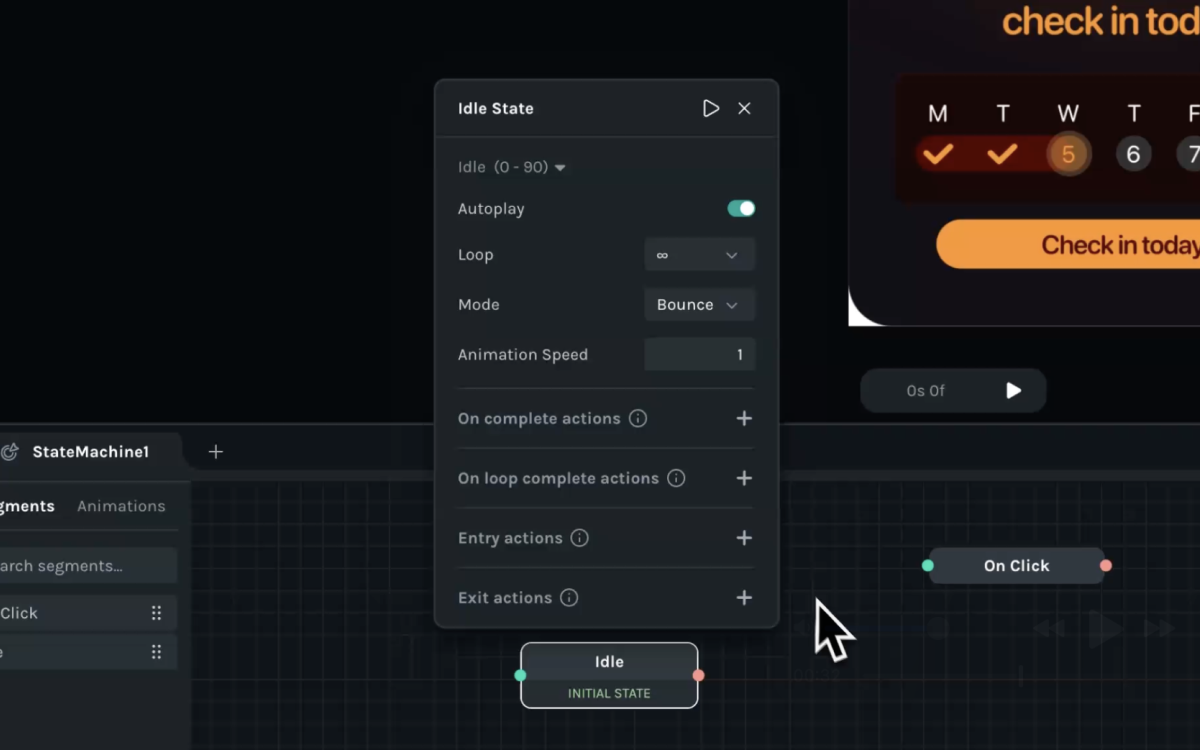
Click on Idle state for more options. Select infinite loop and change Mode to bounce.
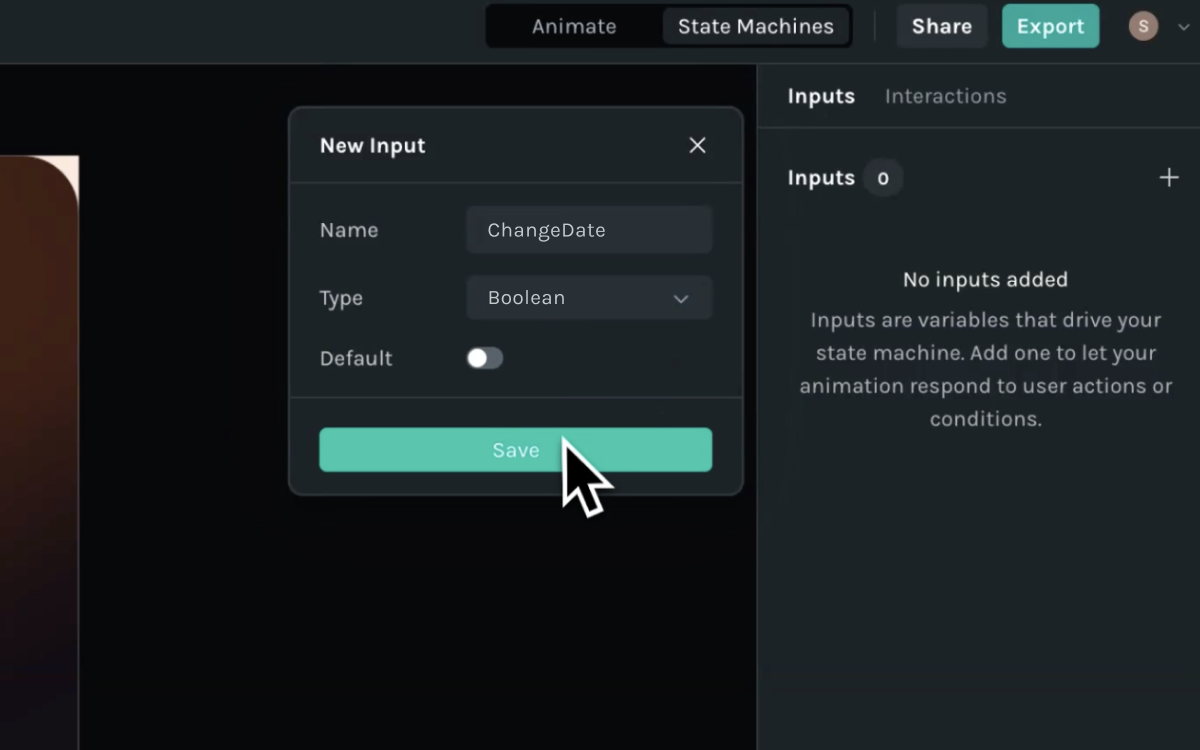
Step 5:
Add a Boolean input and name it ChangeDate, or you can name it anything you want.
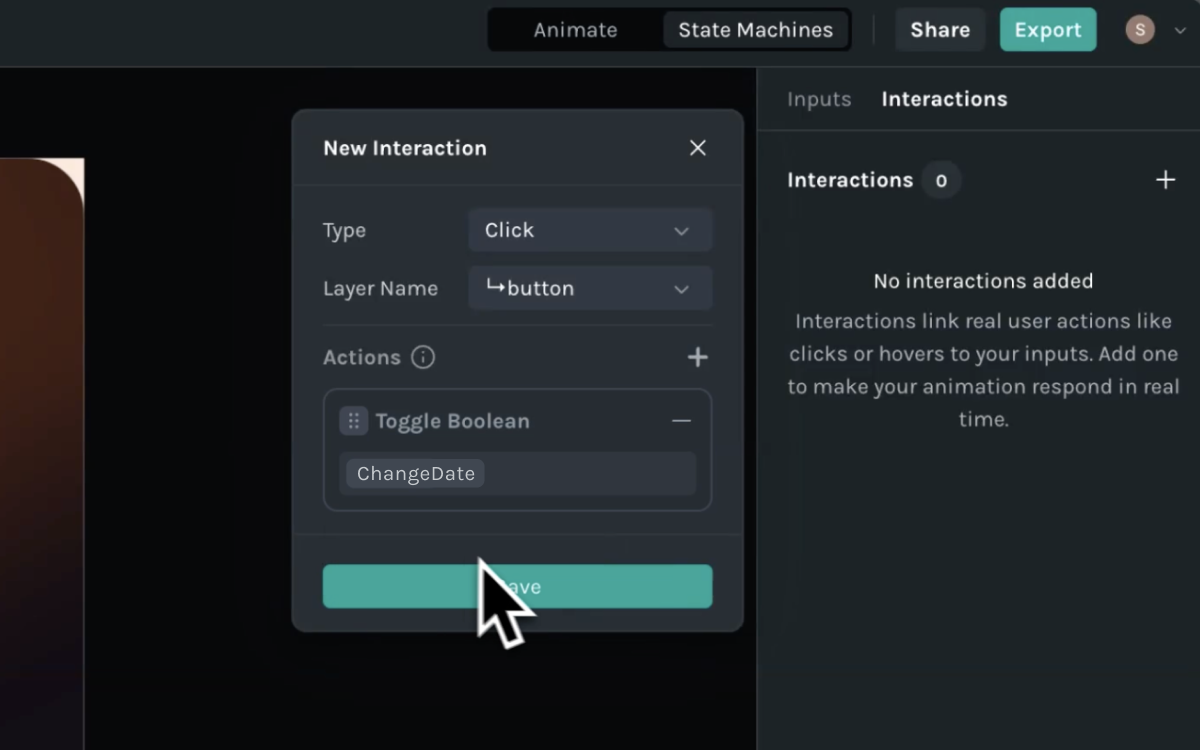
Step 6:
Add a click interaction and keep the button (Check in today) layer as target layer. Select Toggle Boolean as Action option and select the input you have just added (ChangeDate).
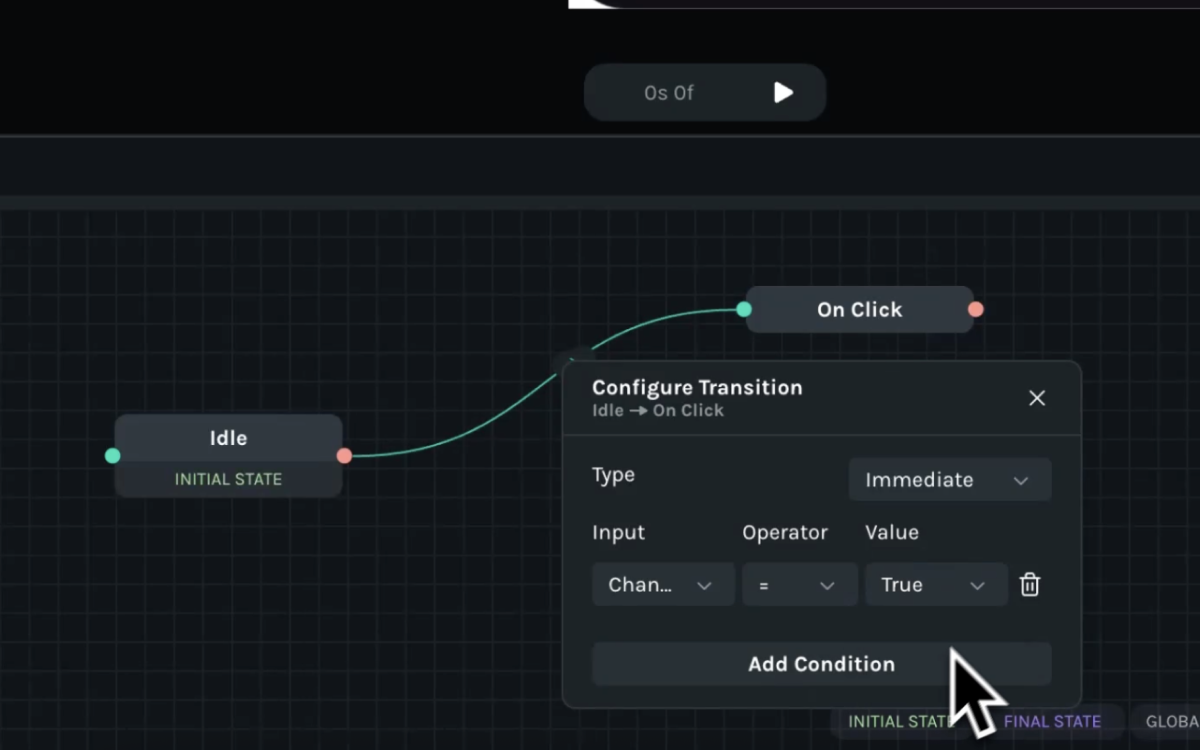
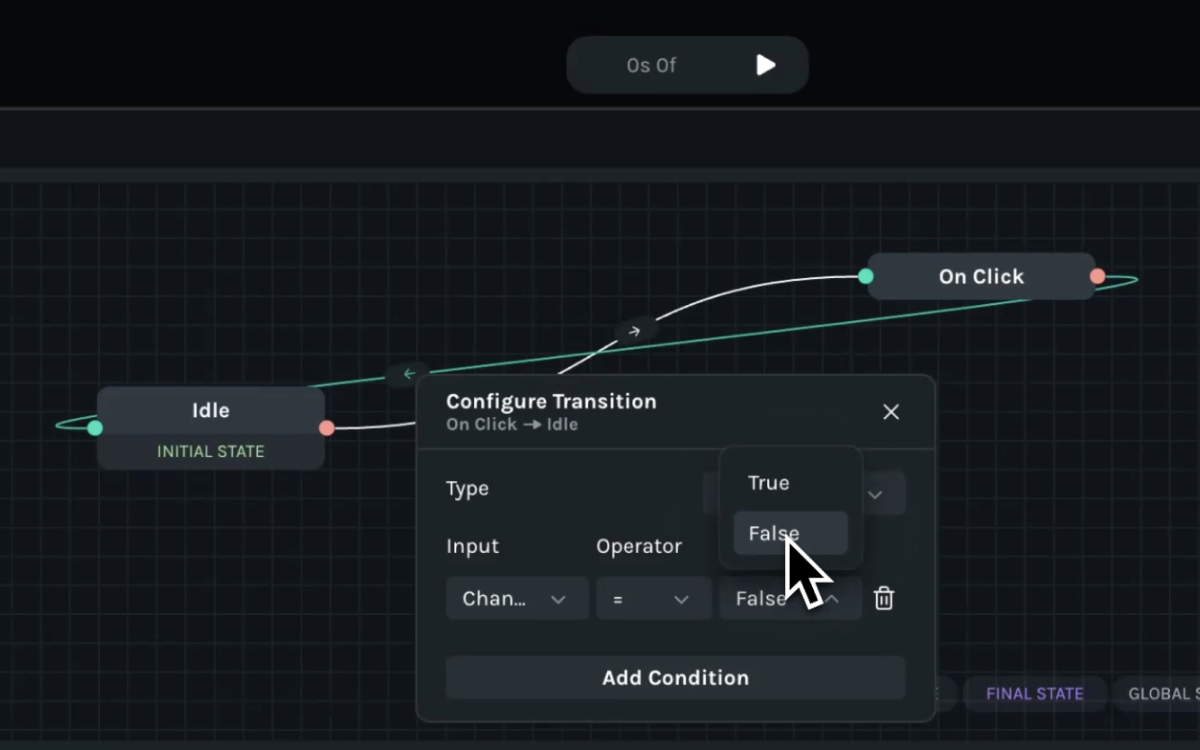
Step 7:
Now, connect the Idle state to the On Click state. Open the Configure Transition box and add a condition. Select the ChangeDate input that you added before and change the value as true.
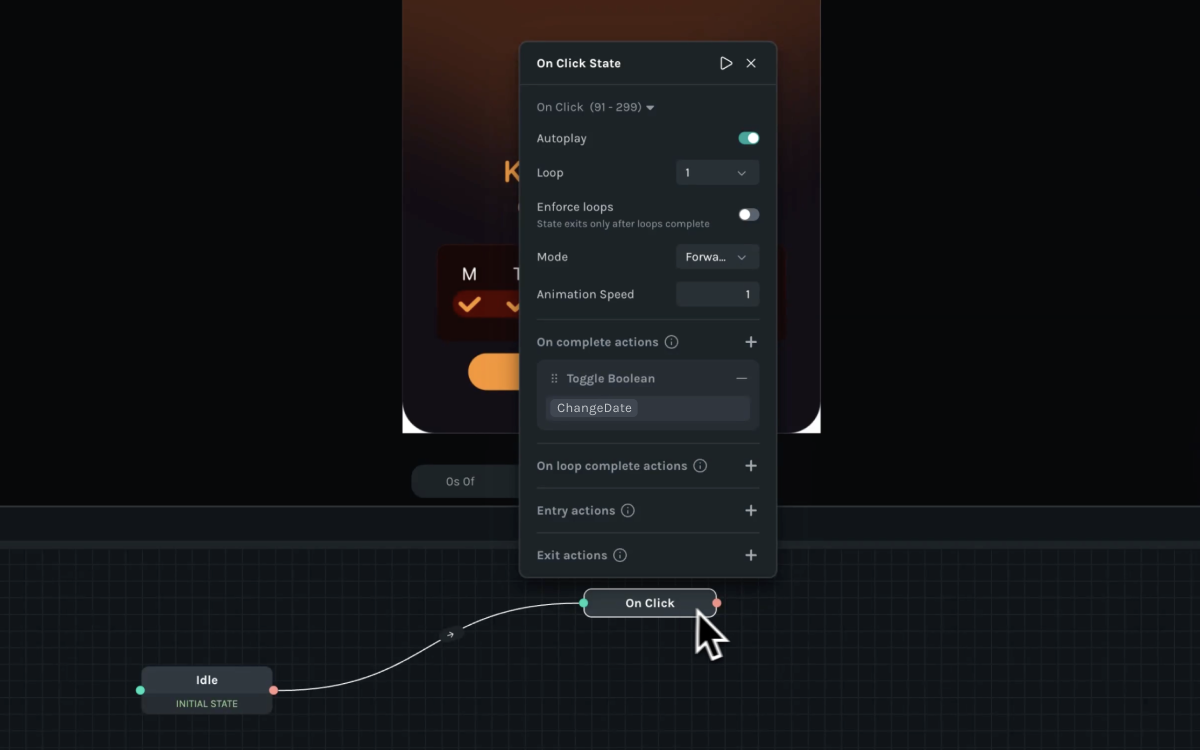
Step 8:
Select the On Click state for more options. Click on the plus icon beside the “On completion actions” Label, and select Toggle Boolean. Select ChangeDate as the input.
Step 9:
Connect On Click state back to the Idle state so that the animation goes back to Idle state once On Click state is done animating.
Step 10:
Now, you can play the State Machine and click on the “Check in today” button to play the On Click segment at any moment.
We’ve included the remix link below so you can open this animation directly in Lottie Creator, experiment with the boolean setup, and customize it for your own projects.
Implementing in a Web App (For Developers)
Let’s get started using our state machines in a React web application!
Start by installing the package:
```
Pnpm add @lottiefiles/dotlottie-react```
Then in our app.tsx file:
import { DotLottieReact, DotLottie } from '@lottiefiles/dotlottie-react';

Function App() {
	Return (
<div>
	<DotLottieReact
       src=’animation url’
	stateMachineId=’check-in’
     />


</div>
)
}
Since we configured Interactions, the player takes care of setting up user interactions for us!
Where can you use this?
dotLottie State Machines is a powerful tool for interactive UI elements and gamification. Here are two use cases:
- Interactive app features: You can integrate State Machines into apps for engagement. For example, using an animation like this to visualize a service ranking system, where clicking changes the state dynamically.
- Game mechanics: State Machines can be used in game logic, such as triggering character animations.
Explore dotLottie State Machines for animations
dotLottie State Machines are incredibly powerful because they allow you to create responsive, non-linear animations that adapt to user interactions and conditions.
Instead of relying on a simple start-to-end animation sequence, you can build a dynamic system where animations trigger based on events like clicks, hovers, or completion of other animations. This makes them perfect for interactive UI components, game mechanics, and real-time user feedback systems.
By structuring animations with states and transitions, you gain greater flexibility, scalability, and reusability, making your animations more efficient and engaging.