Want to bring some more life to your application start up process and engage your users? This brief tutorial shows how you can add an animated splash screen in about 10 minutes.
1. Install the necessary player control
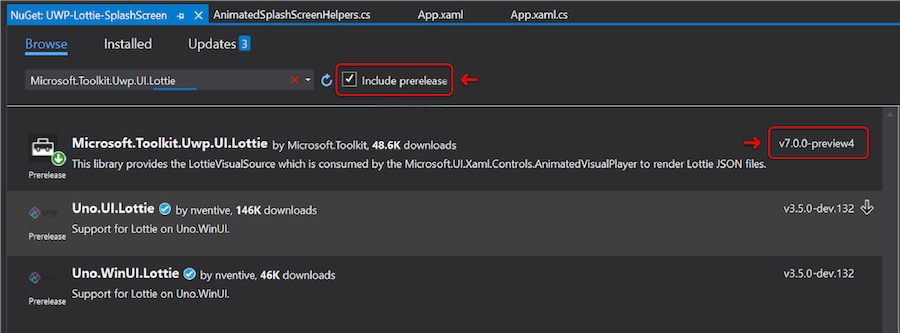
Install the Lottie Nuget package Microsoft.Toolkit.Uwp.UI.Lottie. You're going to want the pre-release version 7.0.0-preview4, as it adds support for loading animations from streams.
The Microsoft Lottie player is very quick to implement and highly performant, though there's a variety of other options available that we're not going to cover today.
2. Add the splash screen helper code:
class AnimatedSplashScreenHelpers
{
    /// <summary>
    /// Runs a given lottie animation full screen
    /// </summary>
    /// <param name="animationUri">eg: ms-appx:///Assets/splash.json</param>
    /// <returns></returns>
    public static async Task RunAnimatedSplashScreenAsync(Uri animationUri)
    {
        //The window needs to be active for the animation to play
        Window.Current.Activate();

        var originalWindowContent = Window.Current.Content;

        //Create the element tree manually
        var splashBorder = new Border
        {
            Padding = new Thickness(40),
            Background = new SolidColorBrush(Colors.White)
        };

        var source = new LottieVisualSource();
        var player = new AnimatedVisualPlayer
        {
            Stretch = Stretch.Uniform,
            AutoPlay = false,
            Source = source
        };

        var stream = await GetAssetInputStream(animationUri);
        await source.SetSourceAsync(stream);

        splashBorder.Child = player;

        Window.Current.Content = splashBorder;

        await player.PlayAsync(0, 1, false);

        // Reset window content after the splashscreen animation has completed.
        Window.Current.Content = originalWindowContent;
    }

    private static async Task<IInputStream> GetAssetInputStream(Uri assetPath)
    {
        var file = await StorageFile.GetFileFromApplicationUriAsync(assetPath);
        var stream = await file.OpenStreamForReadAsync();

        return stream.AsInputStream();
    }
}
3. Find or make an animation
Now for the creative part! You've got a few great options for sourcing animations:
- Go to LottieFiles and search from the millions of publicly available options
- Jump on to the LottieFiles Discord channel and post a message on
#seeking-freelancer - If you're feeling adventurous, check out our tutorials on how to make a Lottie and make your own!
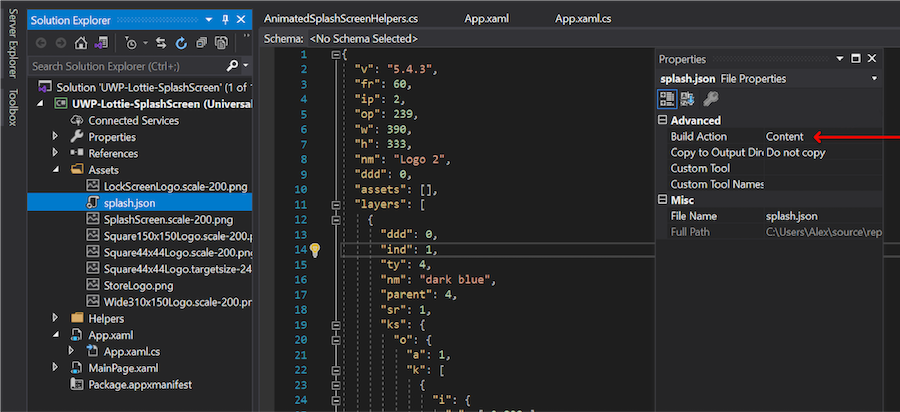
Add the animation file, make sure it's set to content:
4. Set the animation to play
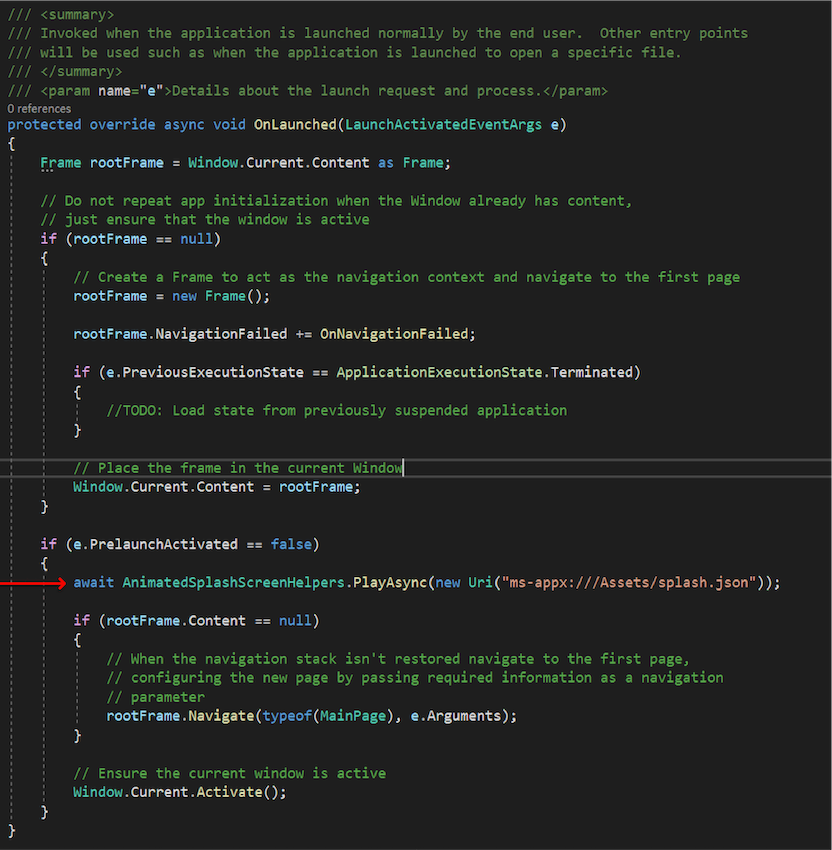
In your OnLaunched method, you can add the call to render the Lottie:
await AnimatedSplashScreenHelpers.PlayAsync(new Uri("ms-appx:///Assets/splash.json"));
The call can be inserted towards the end of the OnLaunched method, before navigating to the first page (main in this example).
5. Optional extra, only play on first run
You might want to only show your user the animation on the first run of your application perhaps because it's a welcome screen, or an infographic sequence they won't need to see every time. It's easy to restrict the playback to only the first launch. Add Nuget package Microsoft.Toolkit.Uwp, this is gives us the easy check for "is first run".
You could also use .IsAppUpdated if you wish to show an animation which is related to a recent update, giving users a strong visual hint that they might otherwise have missed with the store auto update process.
if (SystemInformation.IsFirstRun)
{
    await AnimatedSplashScreenHelpers.PlayAsync(new Uri("ms-appx:///Assets/splash.json"));
}
6. Show me the code!
I hope this write up was useful - if you want to get started straight away, there's a project available here so you can quickly test an animation and see it working.