Lottie animations have changed your life, adding magic to dazzle your users has suddenly become effortless for developers. And now, you, your team, your friends, your partner, kids, and maybe even your dog are all using cool animations everywhere! It’s so beautiful! 😭
Lottie supports Web, Android, iOS, Desktop and even Multi-Platform. So basically everything, right? 😁
If you have been using the Lottie Library by Airbnb, life has been treating you good... well, until you reach the point where you need to add some this magic to your Apple Watch apps and you realise it’s not supported. And then this is how you react:

This article is here to give you peace of mind, and show you how to support Lottie animations in your watchOS apps. 😁

Getting started
Ok, so to begin, we need to understand that the Lottie library by Airbnb doesn’t support watchOS, and the reason is because it requires CoreGraphics in order to render the animations and the framework is not part of the watchOS bundle.
But don’t worry, we have alternatives and that’s what we are covering here today.
To get started, create a new Xcode project for watchOS (it doesn’t really matter how you decide to do it, if it’s a Standalone app or an extension of your iOS app).
Once the project is created, close it and in terminal navigate to the root folder of the project. Then initiate CocoaPods for the project with the following:
pod init
Then open the Podfile using your editor of choice. Here we will add the required pods to our watchOS extension target.
target 'LottieTutorialWatchOS WatchKit Extension' do
  platform :watchos, '6.0'
  use_frameworks!
  pod 'SDWebImageLottieCoder', '~> 0.1.0'
end
Then back to terminal, install the pods with:
pod install
Once it’s done installing the dependencies, open your project using the xcworkspace file.
At this stage, you should try to build the project using CMD+B to make sure everything is in order.
. . .
You may encounter an issue compiling the pods like the one I've shown in this image below 👇
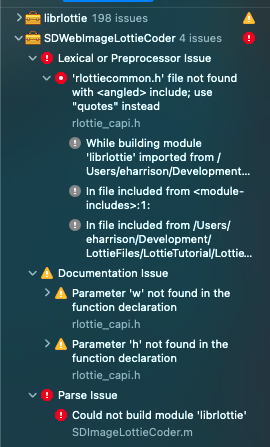
If you do encounter this issue, simply navigate to rlottie_capi.h file and replace the following line.
// from
#include <rlottiecommon.h>
// to
#include "rlottiecommon.h"
Try to build again and everything should be fine. 😊
. . .
Implementing on watchOS with Storyboards
At this stage, you have everything set and it’s finally time for some fun!

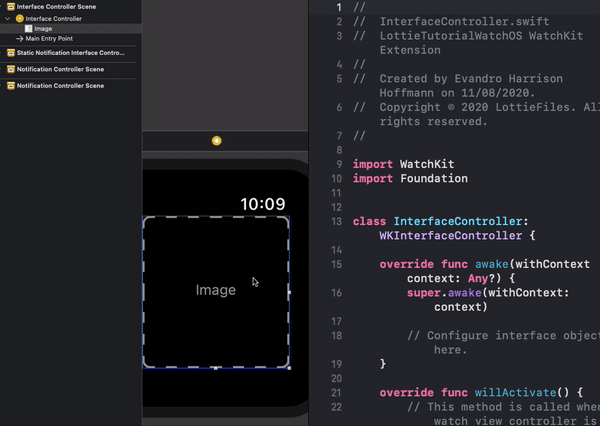
Start by opening the storyboard and adding an InterfaceImage and connect it to your InterfaceController class.
Then, navigate to InterfaceController.swift and start by importing SDWebImageLottieCoder.
import SDWebImageLottieCoder
Now, we are going to start adding our animation configuration. First step is to add the variables to support our implementation. Add this right after closure of awake func.
// MARK: - Animation
private var coder: SDImageLottieCoder?
private var animationTimer: Timer?
private var currentFrame: UInt = 0
private var playing: Bool = false
private var speed: Double = 1.0
Having that set, let’s load the animation data.
/// Loads animation data
/// - Parameter url: url of animation JSON
private func loadAnimation(url: URL) {
  let session = URLSession.shared
  let dataTask = session.dataTask(with: URLRequest(url: url)) { (data, response, error) in
    guard let data = data else { return }
    DispatchQueue.main.async {
      self.setupAnimation(with: data)
    }
  }
  dataTask.resume()
}
Then we configure the animation with the loaded data:
/// Decodify animation with given data
/// - Parameter data: data of animation
private func setupAnimation(with data: Data) {
  coder = SDImageLottieCoder(animatedImageData: data, options: [SDImageCoderOption.decodeLottieResourcePath: Bundle.main.resourcePath!])
  // resets to first frame
  currentFrame = 0
  setImage(frame: currentFrame)
  play()
}
After this, we set the current frame into the WKInterfaceImage:
/// Set current animation
/// - Parameter frame: Set image for given frame
private func setImage(frame: UInt) {
  guard let coder = coder else { return }
  imageView.setImage(coder.animatedImageFrame(at: frame))
}
And here’s how we can play/pause our animations:
/// Start playing animation
private func play() {
  playing = true

  animationTimer?.invalidate()
  animationTimer = Timer.scheduledTimer(withTimeInterval: 0.05/speed, repeats: true, block: { (timer) in
    guard self.playing else {
      timer.invalidate()
      return
    }
    self.nextFrame()
  })
}
/// Pauses animation
private func pause() {
  playing = false
  animationTimer?.invalidate()
}
Then we setup the looping and next frame configuration:
/// Replace current frame with next one
private func nextFrame() {
  guard let coder = coder else { return }

  currentFrame += 1
  // make sure that current frame is within frame count
  // if reaches the end, we set it back to 0 so it loops
  if currentFrame >= coder.animatedImageFrameCount {
    currentFrame = 0
  }
  setImage(frame: currentFrame)
}
And finally, we request our animation from awake function:
override func awake(withContext context: Any?) {
  super.awake(withContext: context)
  loadAnimation(url: URL(string: "https://assets8.lottiefiles.com/packages/lf20_Zz37yH.json")!)
}
If you followed all the instructions above (and well, if you also didn’t decide to rebel and go off on your own implementation half way 🤓) this is what you should see:
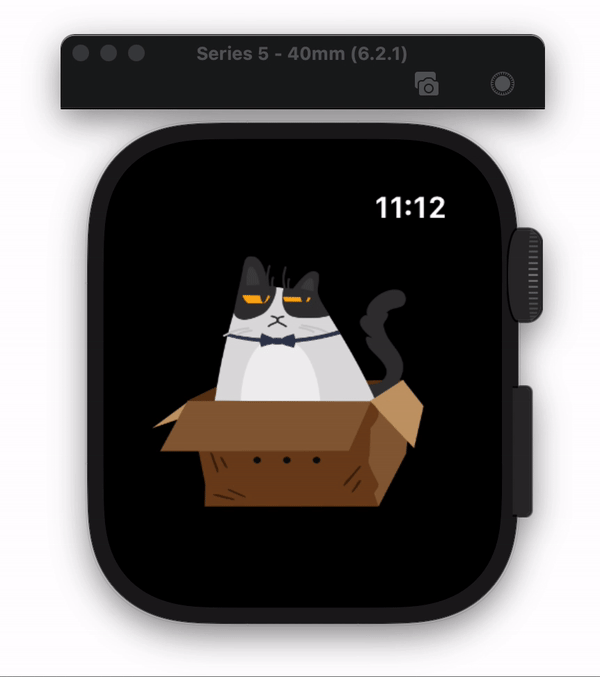
Awesome, right? Now, your watchOS apps are ready for magic, so let’s get creative! 🤩 You can find the full code here.
PS.
This implementation is using rlottie framework (by Samsung) instead of Lottie (by Airbnb), which means that instead of rendering vectors, we are rendering the animations into rasterized bitmaps, frame by frame. This means that some animations might not load the same as they do using vectors.