Adding themes to your Lottie animations can significantly enhance your designs, especially if you need multiple visual styles of a single animation. This step-by-step guide will show you how to integrate Lottie Theming into your Lottie animations using Lottie Creator.
What is Theming?
Theming allows users to leverage the power of the dotLottie format by adding multiple themes into a single file. This enables you can easily embed one animation file into your design project and switch between themes without the need to create multiple files. These customizable themes could be as simple as creating a dark mode or light more, or incorporating multi-brand colors to accommodate a product suite or event seasonal themes.
How to create a theme on Lottie Creator
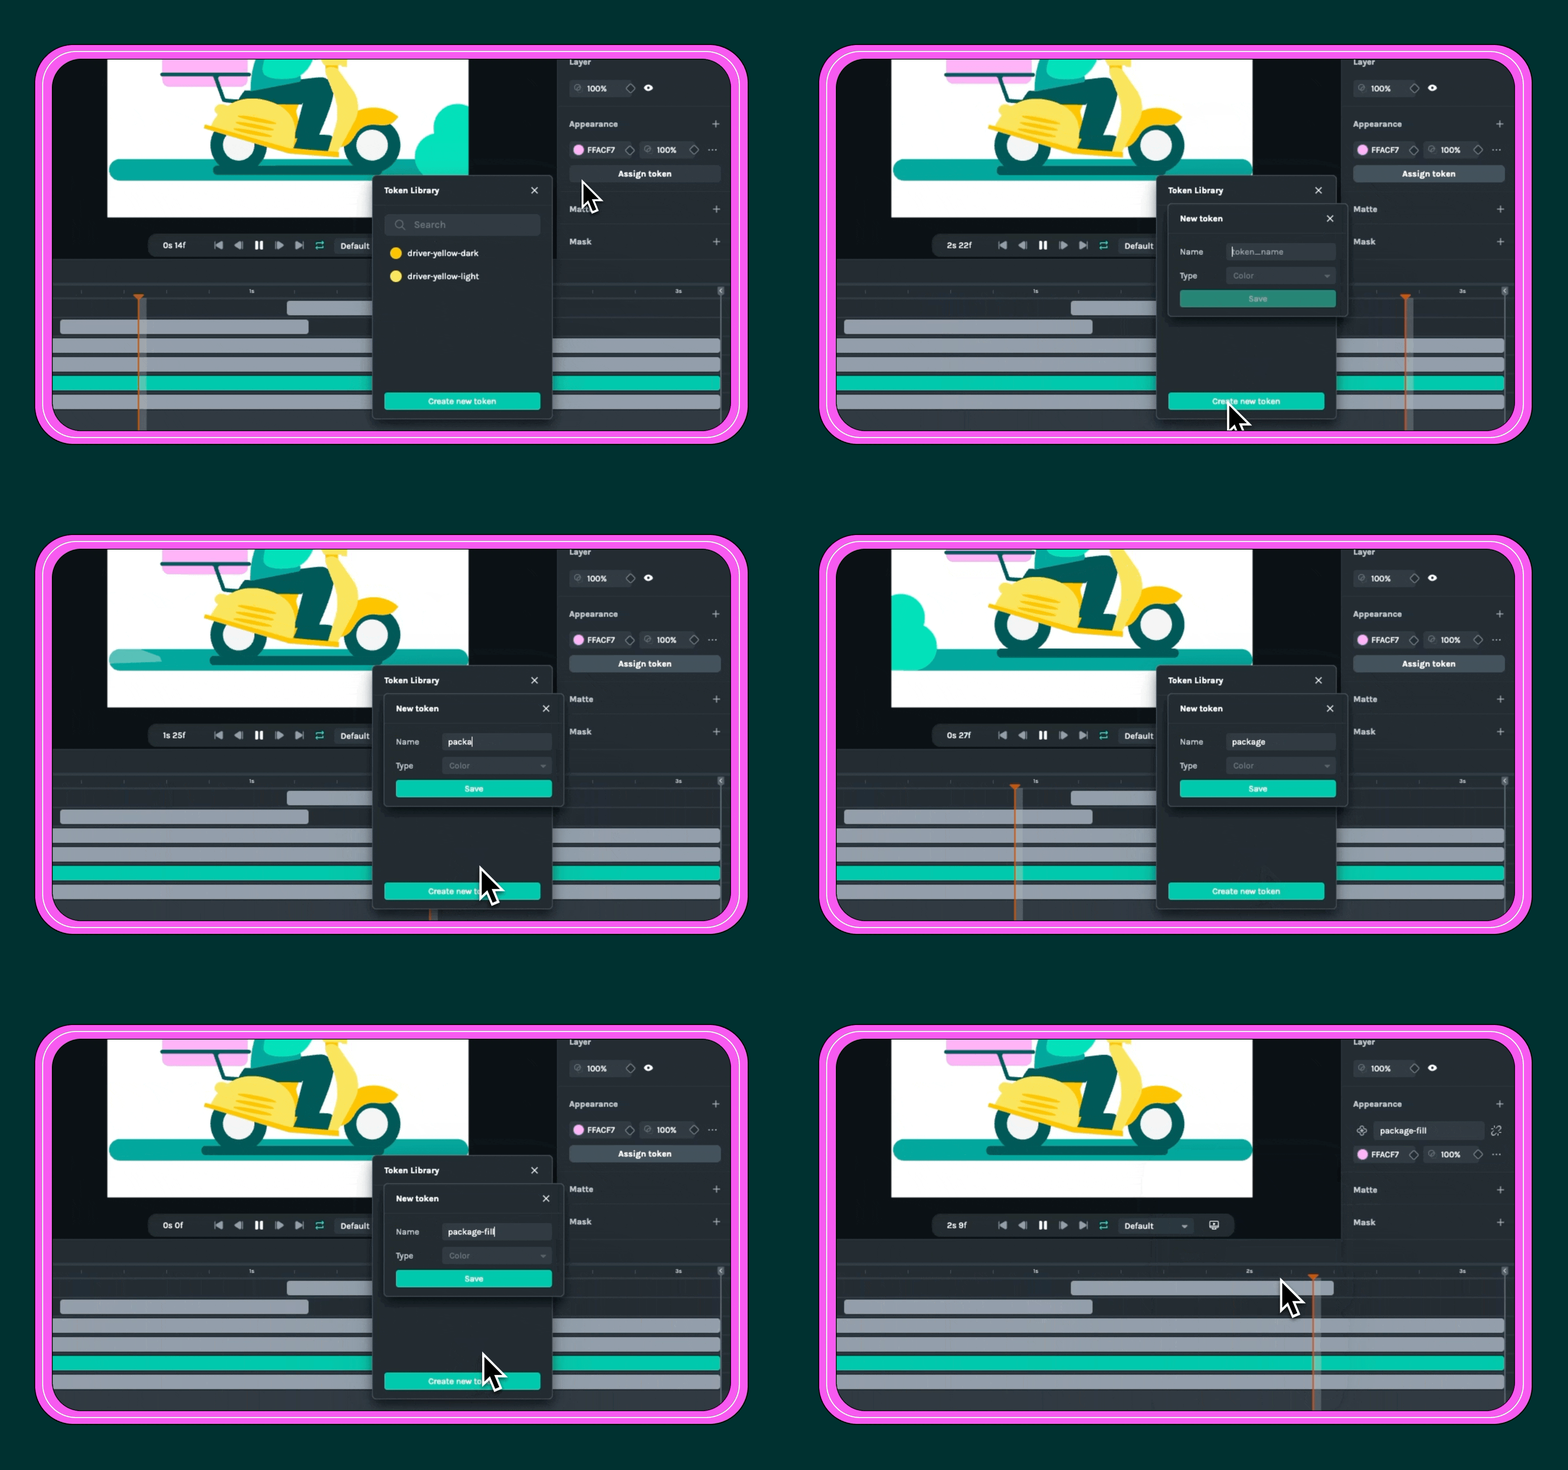
Step 1) Create and assign tokens to your layers.
Once you have prepared your animation on Lottie Creator, you would first have to create a token for the animation layers. Tokens are name-value pairs that represent repeatable design elements—in this case, colors. Here's how to create and assign them:
- Select a layer: Click on the layer in your animation that you want to assign a token to.
- Assign token: In the right-hand panel, find the Appearance section and click on Assign token.
- Create new token: If you haven't created any tokens yet, the Token Library will be empty. Click on Create new token and fill in the details accordingly.
- Repeat: Go through other layers and assign existing tokens or create new ones as needed.
Note: At this time, Lottie Creator supports tokens for colors only.
Step 2) Define the themes
Now that you've set up your tokens, it's time to create different themes:
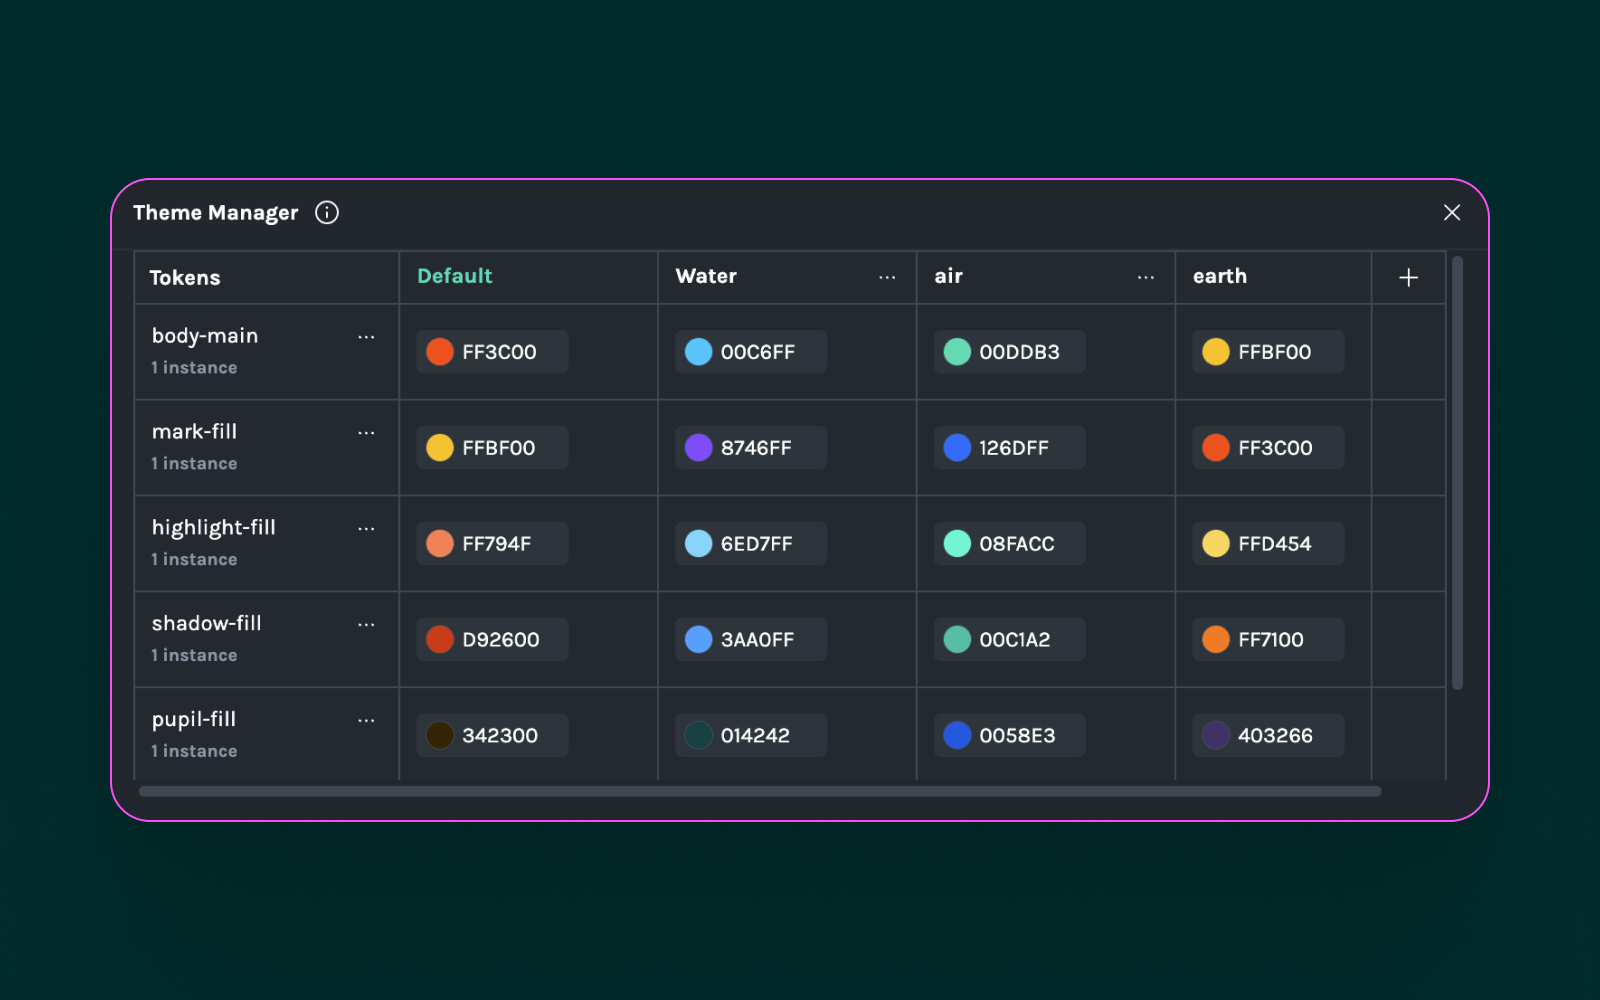
- Open Theme Manager: Locate the Theme Manager on the left side of your property panel/timeline. Here you will find the tokens and their default colors listed already.
- Create a Theme: Click the + button to add a theme. You can add as many themes as you wish.
- Customize Colors: Change the color values for each token in the new theme to match your desired palette.
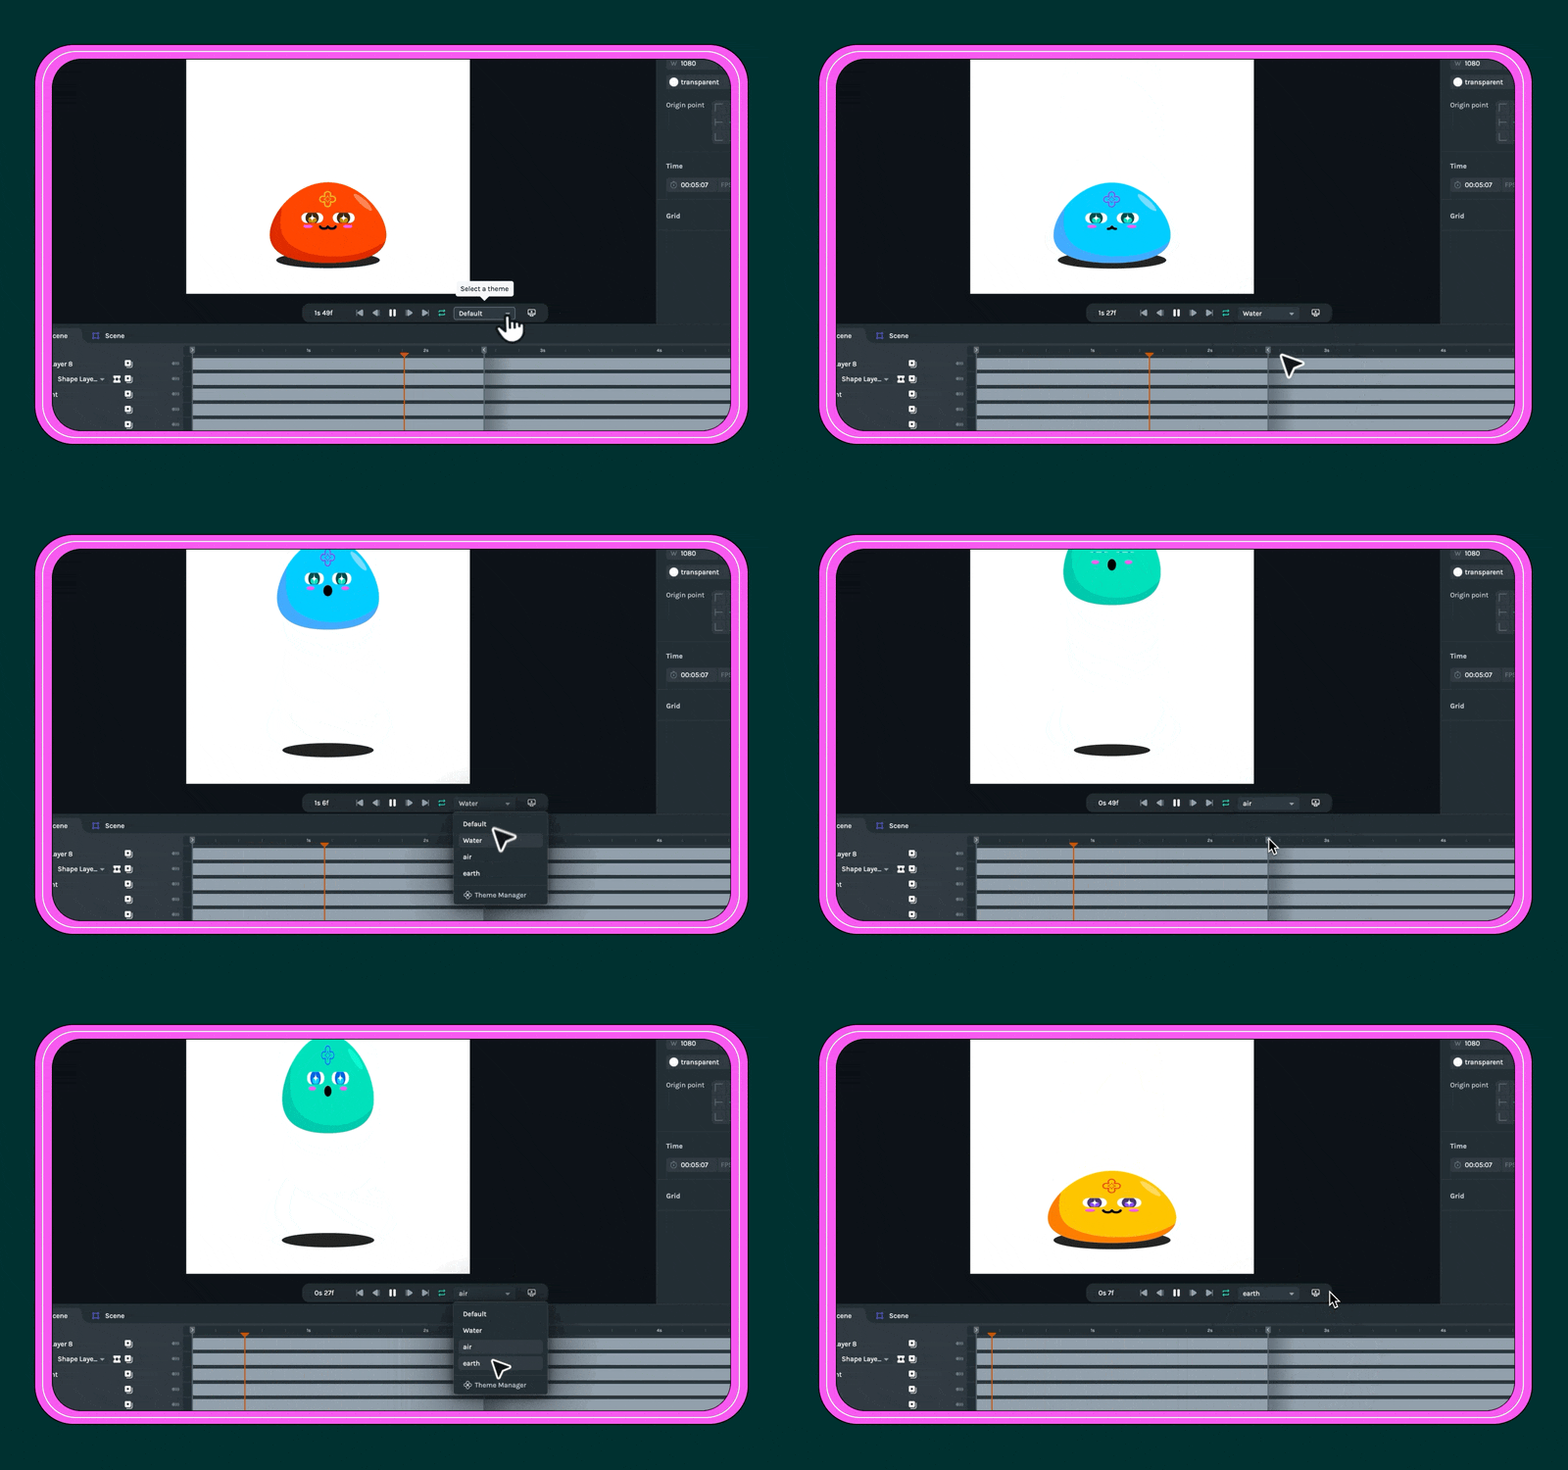
💡 Tip: Click on theme name from Theme Manager will select that theme.
Step 3) Export your themed Lottie animation to your workspace
After setting up your themes, export your animation:
- Click the Export button.
- Fill in the animation name details, choose the workspace where you want to be and then press Save.
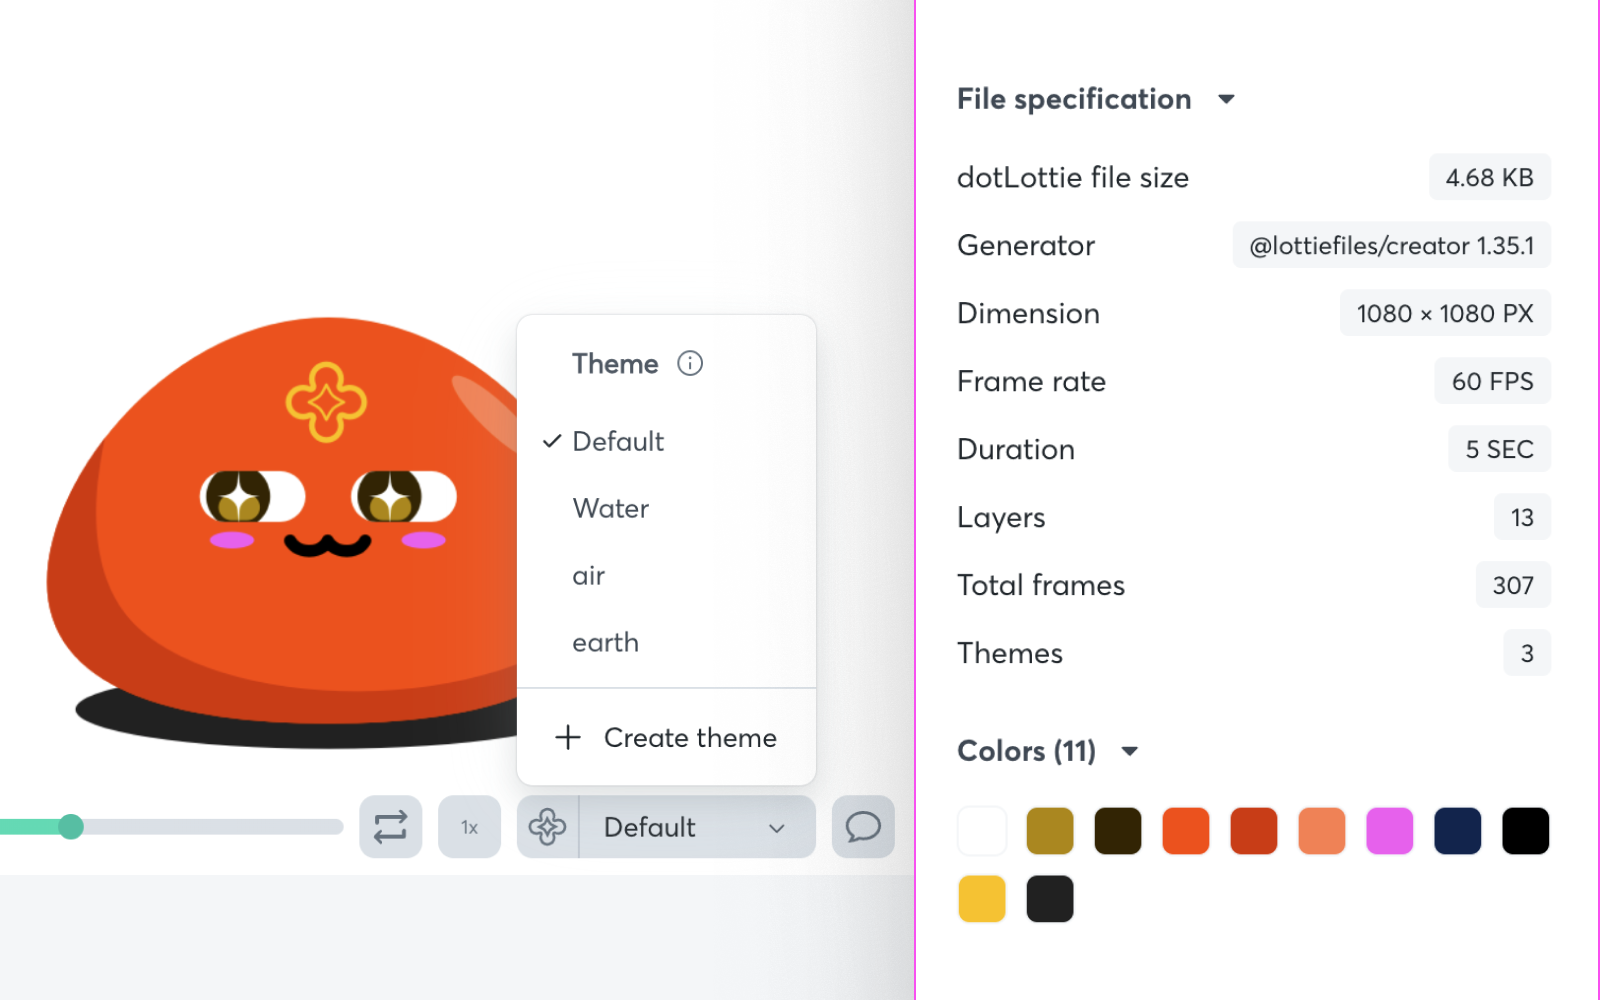
Once saved, you'll see all your themed versions by toggling the dropdown menu on your workspace. The number of available themes will also be visible in the Animation Information panel.
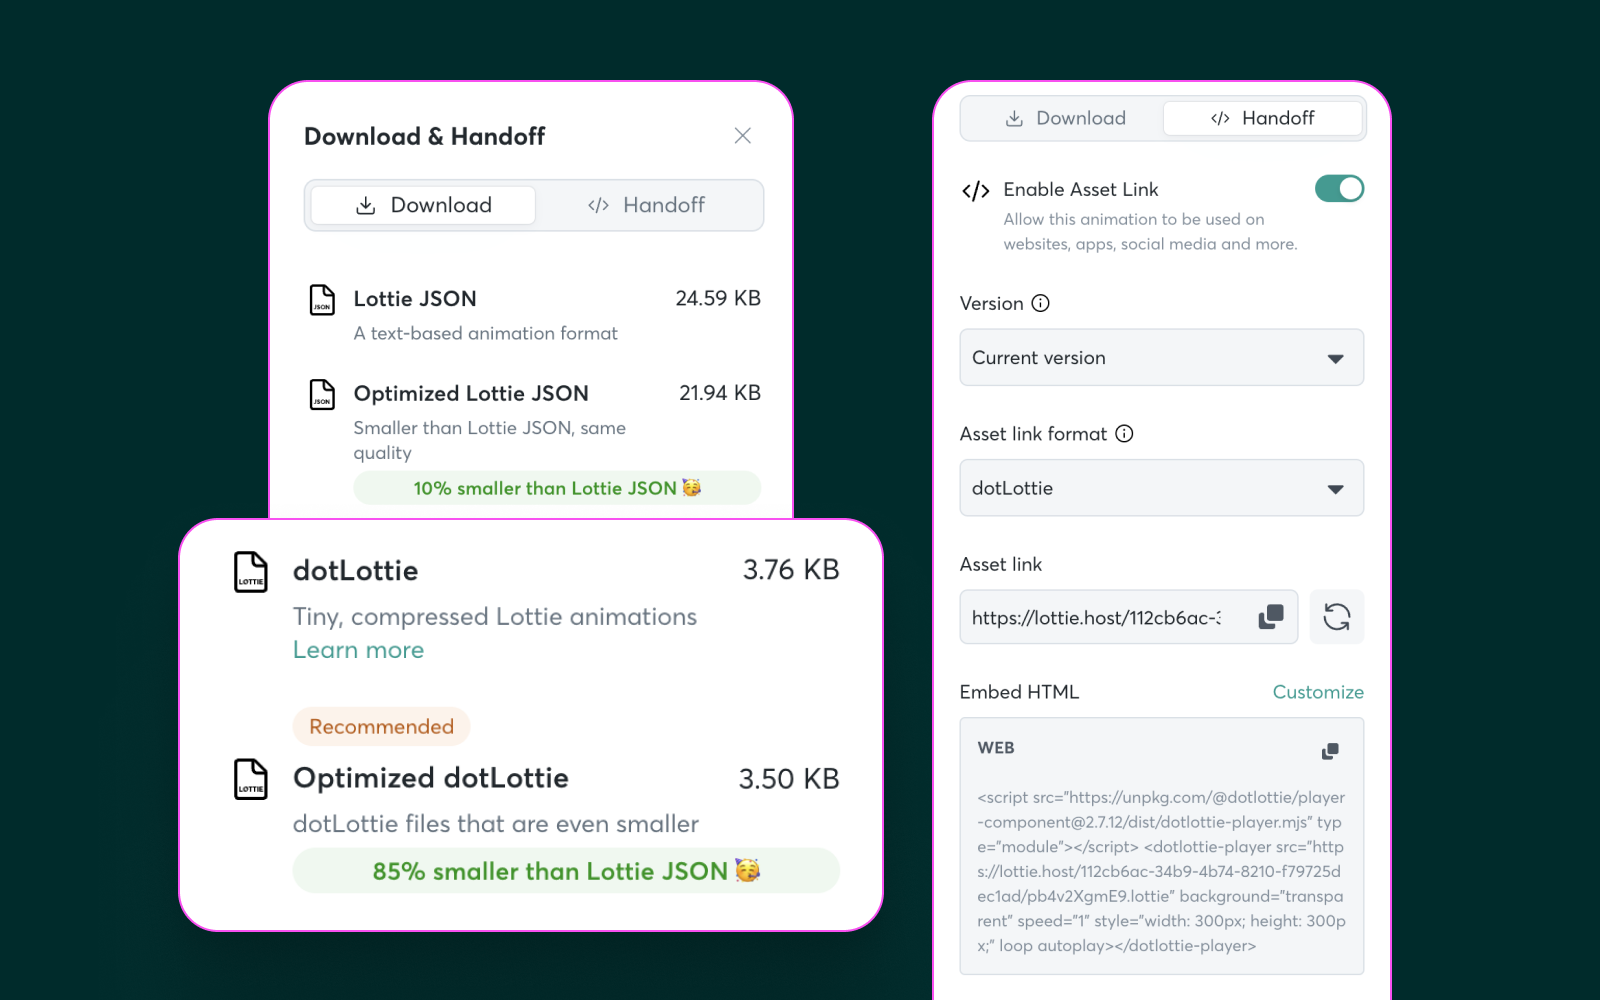
Step 4) Download and embed
When downloading or handing off the embed link for your animation, we recommend choosing the dotLottie or Optimized dotLottie option, as theming is a dotLottie function. If you download it as Lottie JSON/Optimized JSON, you will only be able to download the default theme.
Enjoy creating themed animations
Adding themes to your Lottie animations enhances versatility and efficiency, allowing for seamless integration across different design needs. Start experimenting with themes today to elevate your animations to the next level.
If you want to learn more about Lottie Theming and some practical examples of where it can be used, check out this blog post. Stay tuned for even more blogs and tutorials coming your way!
Happy designing!


