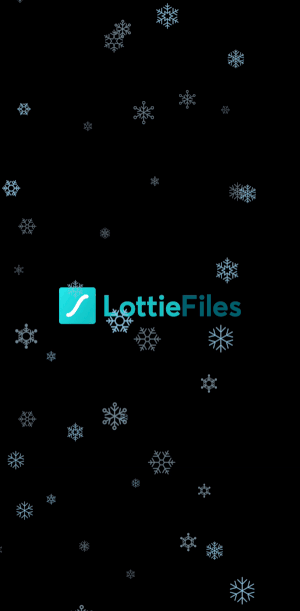
It’s that time of the year when magic is in the air. Christmas time is coming and why not give some magical touch to your apps 🧙🏻♂️.
I'm going to show you here how to make it snow in your app using Lottie animations :).

If you never used Lottie before, I’ll recommend you to check this article.
Adding Lottie to your project
We are going to add Lottie dependency using SPM (Swift Packages Manager), considering you already have your project created:
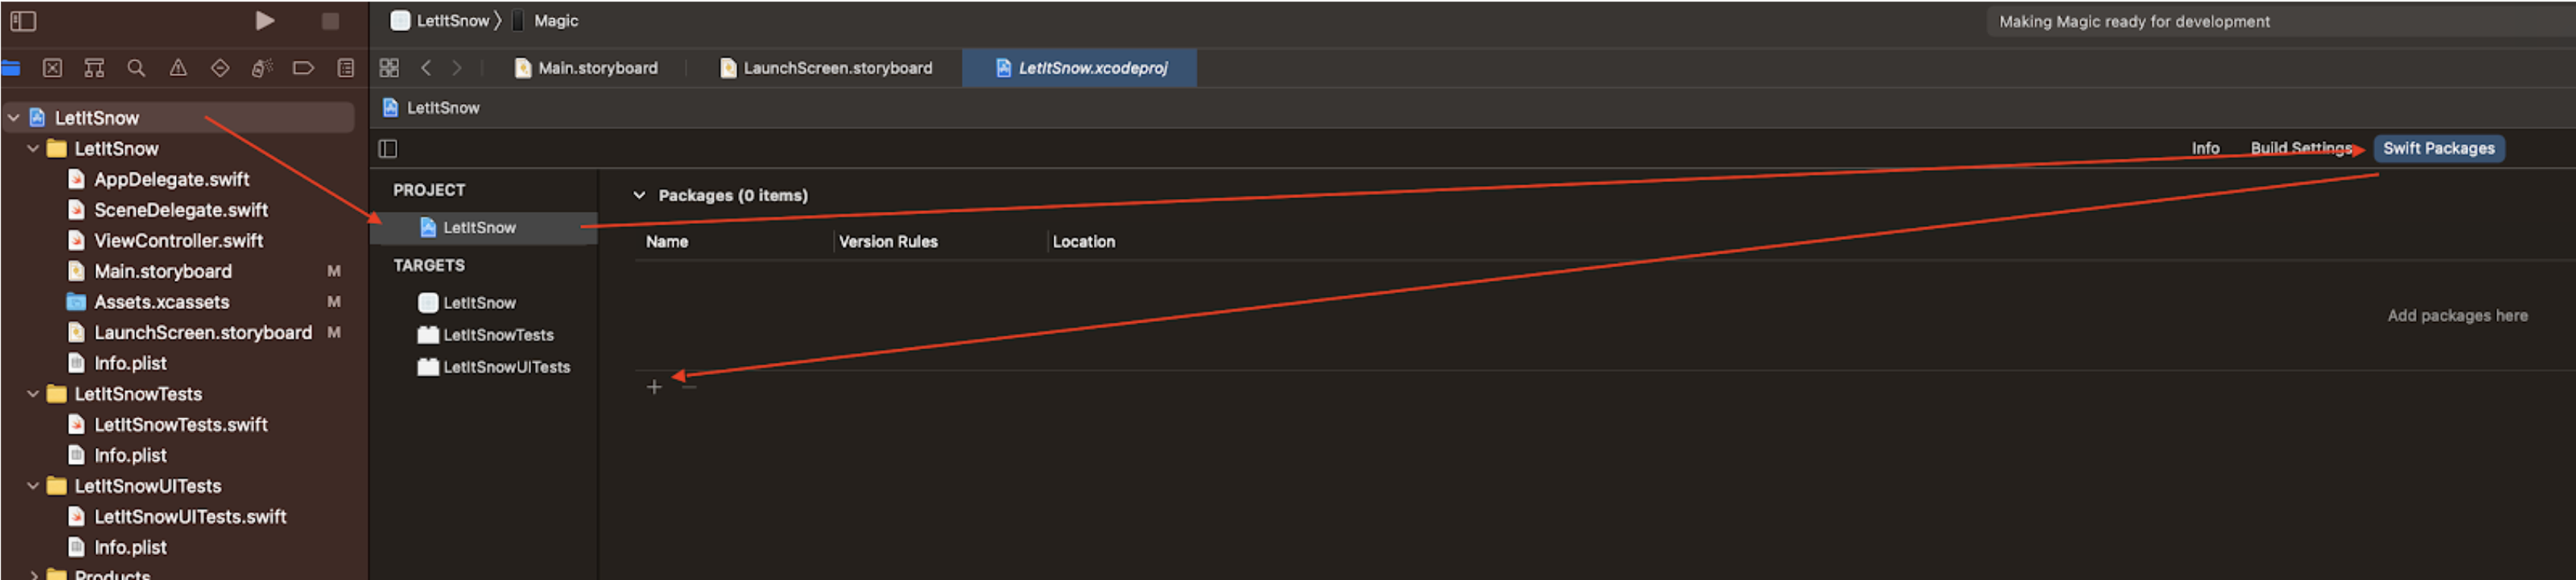
- In the project navigator, tap on your project name
- Select project in the middle of the screen
- At the top tabs, tap on Swift Packages 4.Tap on + button and add the following path: "https://github.com/airbnb/lottie-ios”
- Follow the instructions by tapping Next all the way to the end and BOOM! You have Lottie dependency setup 🥳.
Creating your Snow View
We are ready to bring the holidays to our app, so let’s get started!
First thing, let’s create a new Swift file called SnowView subclassing UIView and begin by importing Lottie and UIKit.
import UIKit
import Lottie

class SnowView: UIView {

}
With that done, next step is to add our AnimationView inside the SnowView we just created:
    lazy var animationView: AnimationView = {
        let animationView = AnimationView()
        animationView.contentMode = .scaleAspectFill
        animationView.loopMode = .loop
        animationView.isUserInteractionEnabled = false // so that we don't cancel touches on the background
        return animationView
    }()
And then we add the AnimationView to the SnowView initializer.
    let animationURL = URL(string: "https://assets9.lottiefiles.com/packages/lf20_N0y2Nj.json")!

    init() {
        super.init(frame: .zero)

        // so that we don't cancel touches on the background
        isUserInteractionEnabled = false

        // add animation view and constraint to self
        addSubview(animationView)
        animationView.translatesAutoresizingMaskIntoConstraints = false
        NSLayoutConstraint.activate([
            animationView.leadingAnchor.constraint(equalTo: leadingAnchor),
            animationView.trailingAnchor.constraint(equalTo: trailingAnchor),
            animationView.topAnchor.constraint(equalTo: topAnchor),
            animationView.bottomAnchor.constraint(equalTo: bottomAnchor)
        ])

        // load and play animation
        Animation.loadedFrom(url: animationURL, closure: { [weak self] (animation) in
            self?.animationView.animation = animation
            self?.animationView.play()
        }, animationCache: LRUAnimationCache.sharedCache)
    }

    required init?(coder: NSCoder) {
        fatalError("init(coder:) has not been implemented")
    }
Awesome, this is where all the magic will happen. Notice that we are basically adding the AnimationView and constraining it to the SnowView, then loading and playing the animation.
Just remaining the final step which is how to use it on our UIViewController 😉. For that, we are adding a small extension to help us out adding with a simple step to any screen in our apps. Add the following extension to the end of the SnowView.swift file:
extension UIView {
    /// Adds snow view and constraint to self
    func startSnowing() {
        stopSnowing()

        let snowView = SnowView()
        addSubview(snowView)
        snowView.translatesAutoresizingMaskIntoConstraints = false
        NSLayoutConstraint.activate([
            snowView.leadingAnchor.constraint(equalTo: leadingAnchor),
            snowView.trailingAnchor.constraint(equalTo: trailingAnchor),
            snowView.topAnchor.constraint(equalTo: topAnchor),
            snowView.bottomAnchor.constraint(equalTo: bottomAnchor)
        ])
    }

    /// Remove snow view
    func stopSnowing() {
        subviews
            .filter({ $0 is SnowView })
            .forEach({ $0.removeFromSuperview() })
    }
}
Here we are simply adding 2 functions: To add and to remove the snow view to a given UIView. And finally, here’s how to use it on our UIViewController:
In viewWillAppear, add the line: view.startSnowing() and run your app to see the magic of Christmas happening 😁.
Here's the full code in case you missed something 🤓.
Now, your app is ready for the holidays, Merry Christmas!!! 🎅🎄